
NZ-666 Kshatriya
Elyn Hobby Kastrysha 1/100 Scale Sophisticated Plastic Model Kit
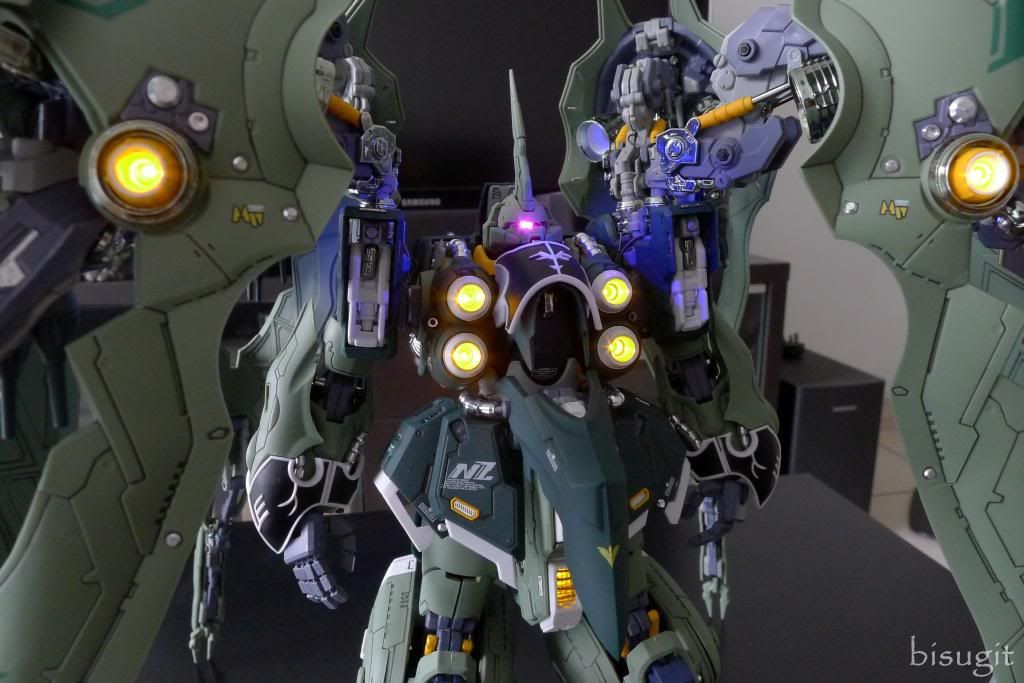
Before I start, I would just like to point out the the official name of this model kit is KASTRYSHA which is based on the mobile suit KSHATRIYA from the anime series Unicorn Gundam. For legal reasons, Elyn Hobby cannot use the actual name of the mobile suit in the said series.
I was really looking forward to building this kit after I saw the promotional images so when the pre-orders opened, I ordered one from a local shop here in Singapore namely, Hobbymate. I waited 6 months before this kit was released and when my order arrived, I didn't waste any time and immediately went to the shop to pick up my item. Picking up this item is not a breeze because you need to check all the parts together with the seller, and there are a whole lot of them! Took me around 20mins (some took about 30mins) and that's just because there's not much problem on the piece that my wife randomly chose. It's a great service on part of the seller because he will do a 1-to-1 replacement for missing or duplicate parts, which I doubt one would get upon ordering online and having them shipped in their place. Good luck asking for parts replacement :-)
It is a unique experience building this 'sophisticated model kit'. To make it short, my feelings for the whole building cycle where like Excited --> Amazed --> Frustrated --> Irritated --> Angry --> Calm --> Tired --> Astonished --> and finally, Proud!
So let's get started!
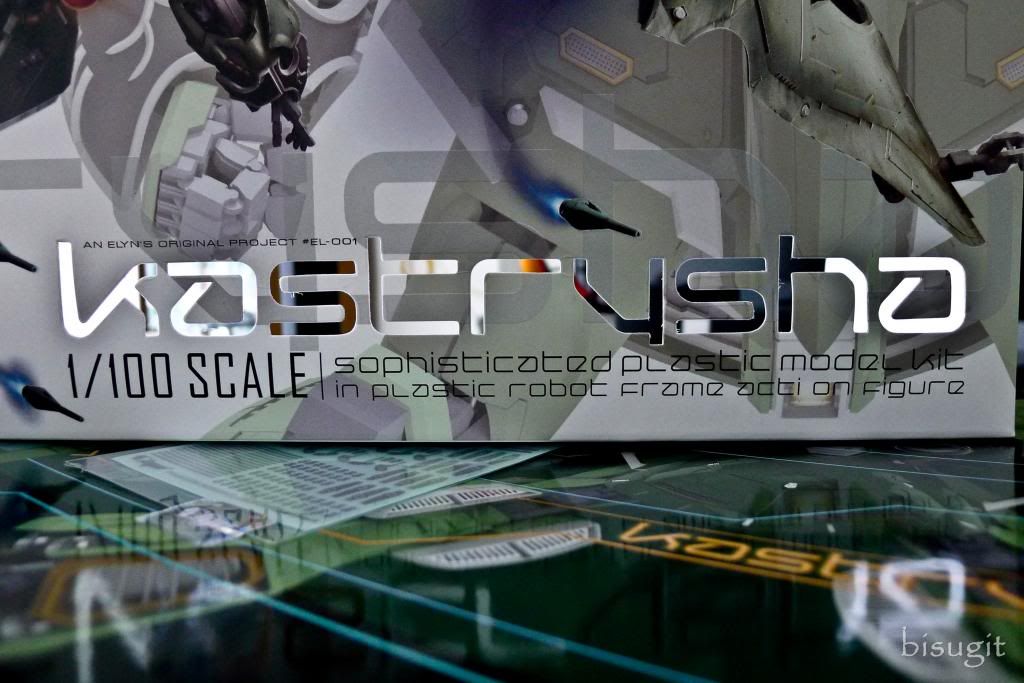
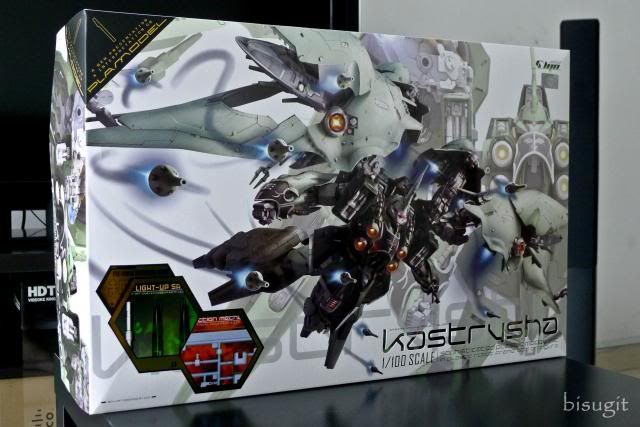
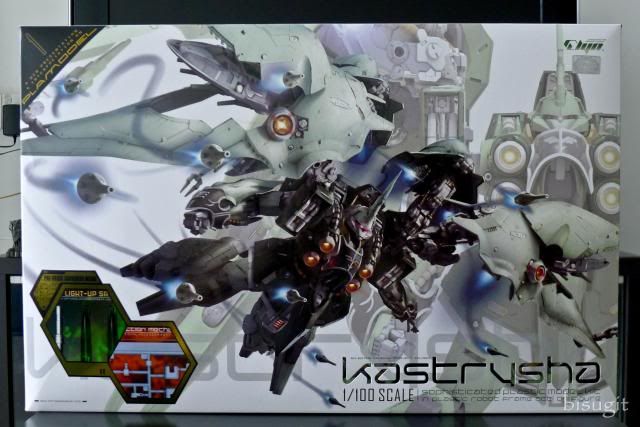
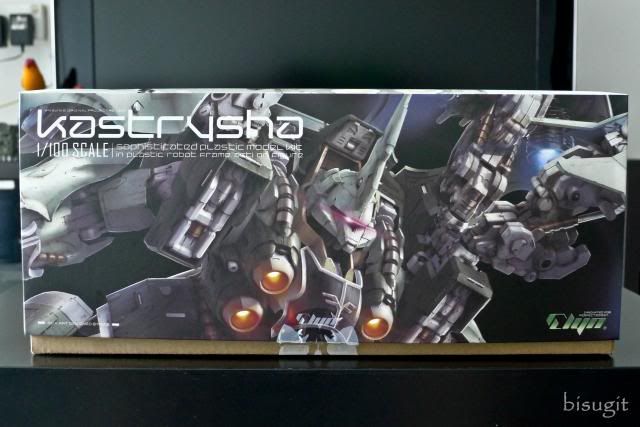
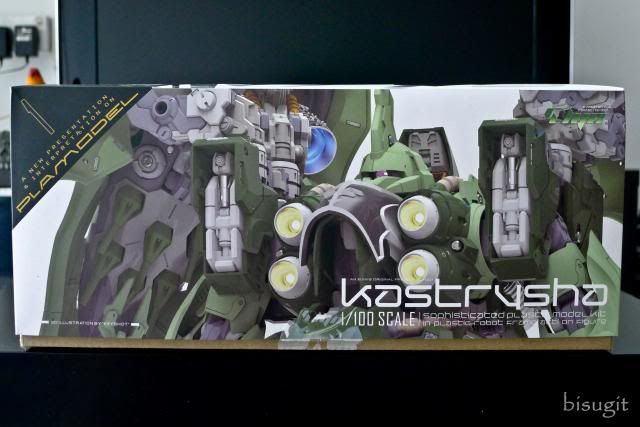
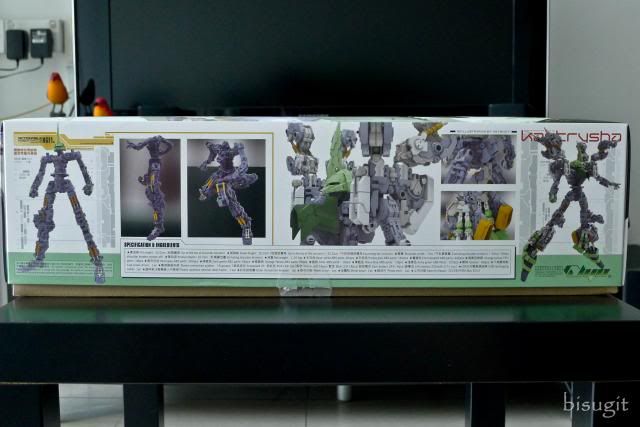
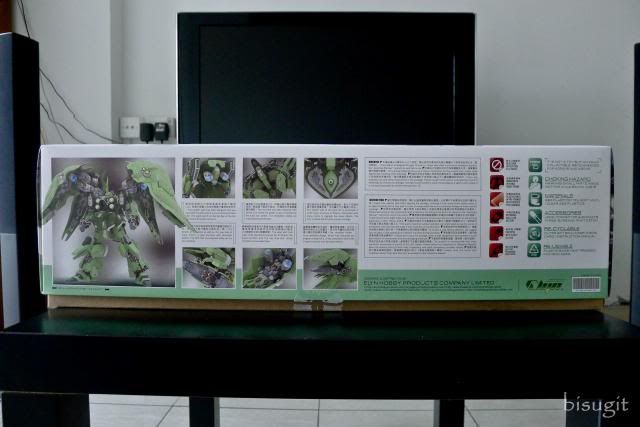
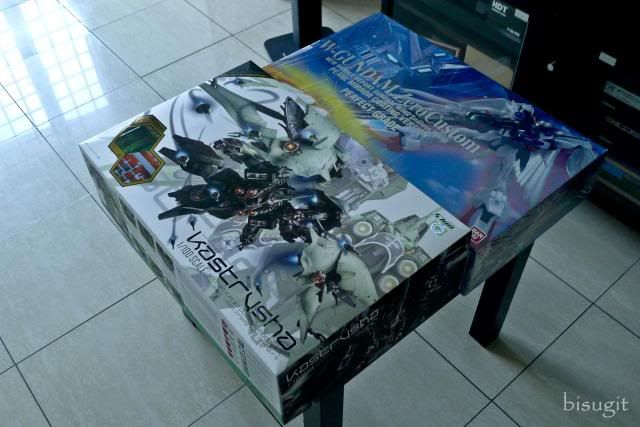
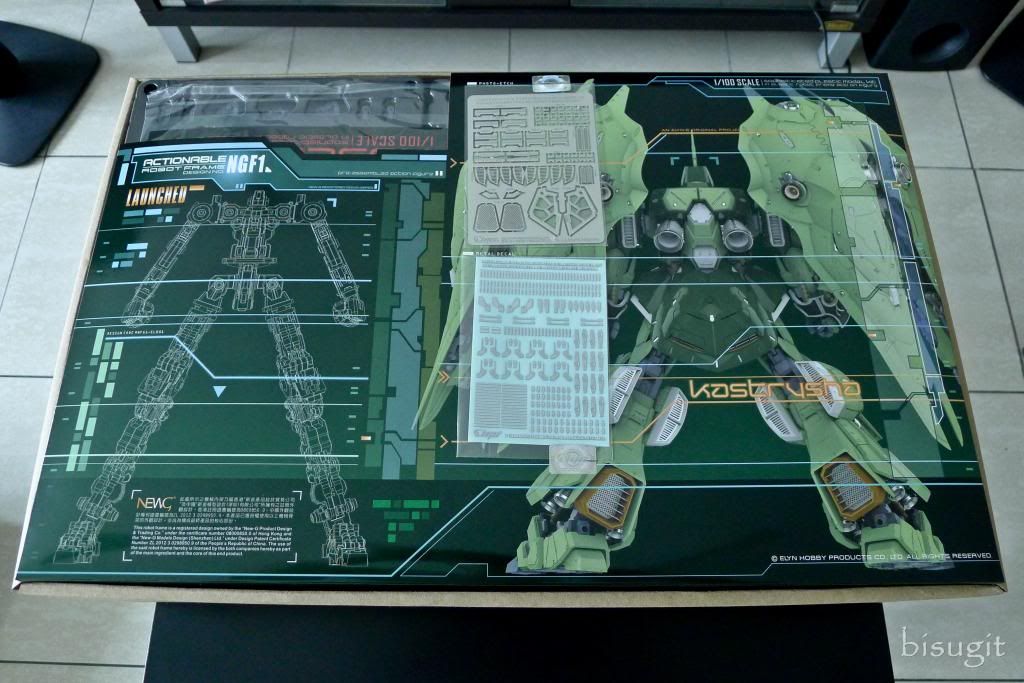
Box Art
 |
 |
 |
 |
 |
 |
 |
 |
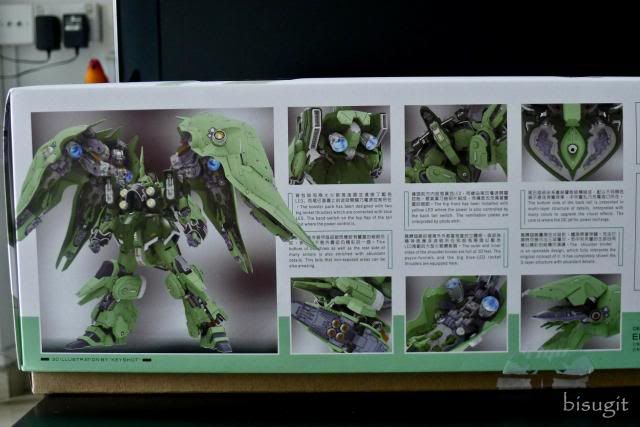 |
One thing's for sure, I'm definitely going to keep this box! I've built more than a hundred model kits and this is one of the coolest looking box I've seen in any model kit.
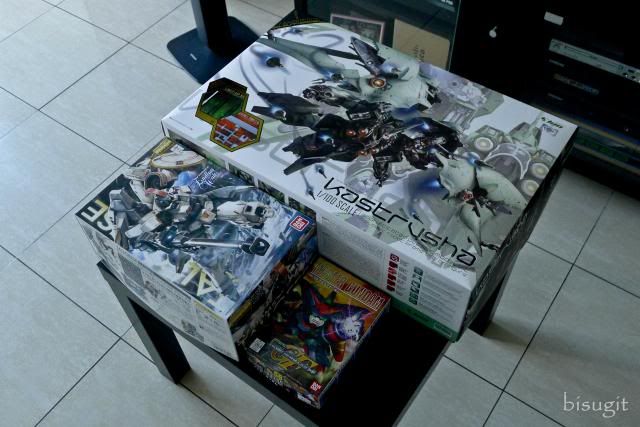
Box Size Comparison
 |
 |
with MG and SD box with PG box
The box is quite huge for a 1/100 scale model kit. It is as big as the Perfect Grade Wing Zero Custom box. You can see how it dwarfed the MG Talgeese and SD Master Gundam boxes.
Box Contents
 |
 |
 |
 |
 |
 |
 |
 |
 |
 |
 |
 |
 |
 |
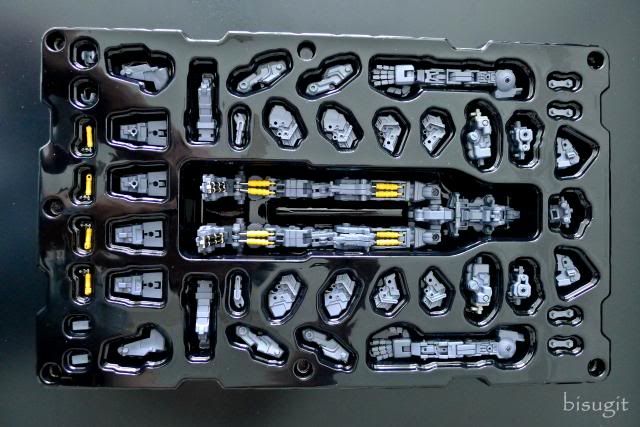
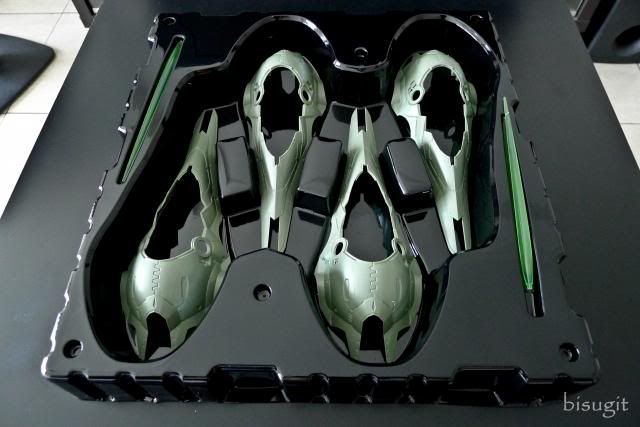
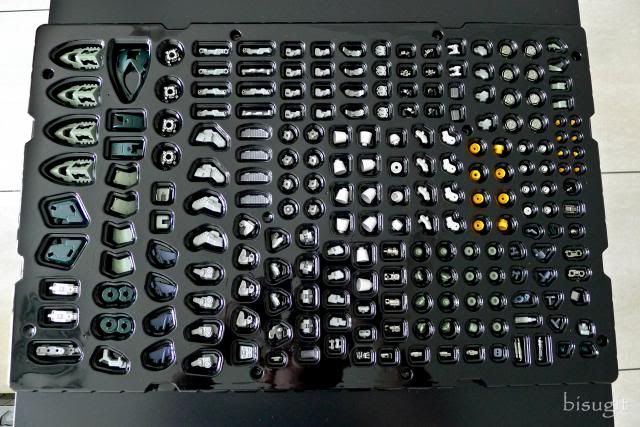
Parts trays compared with MG The O
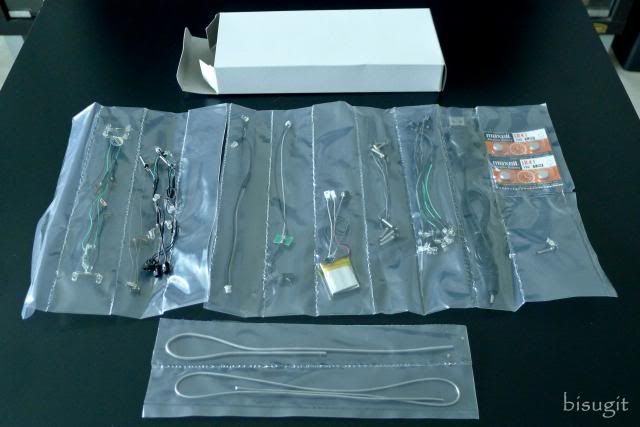
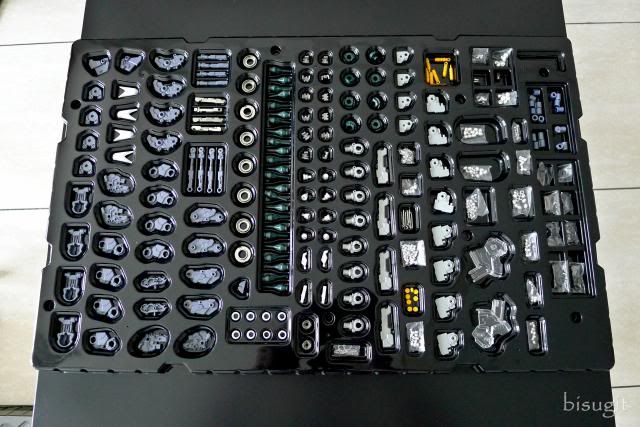
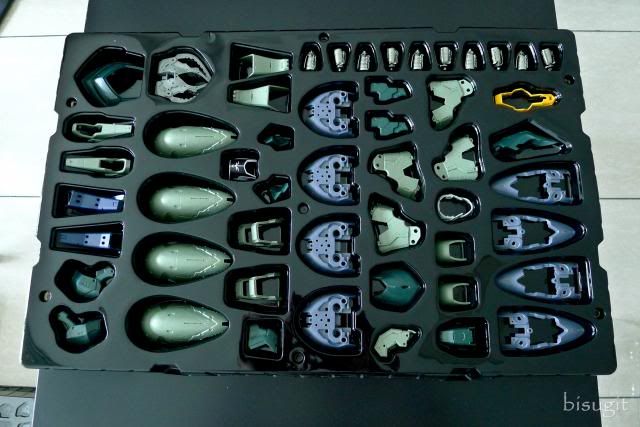
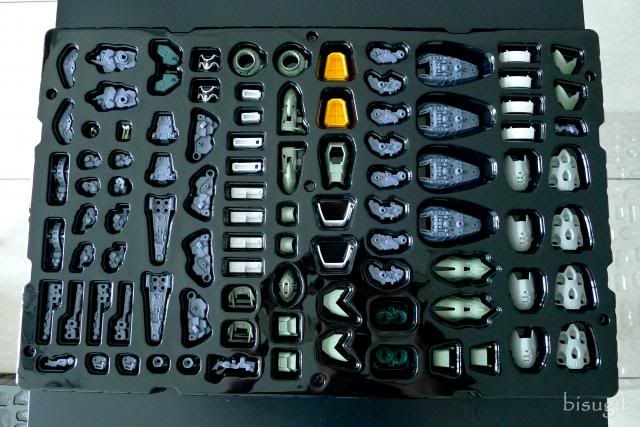
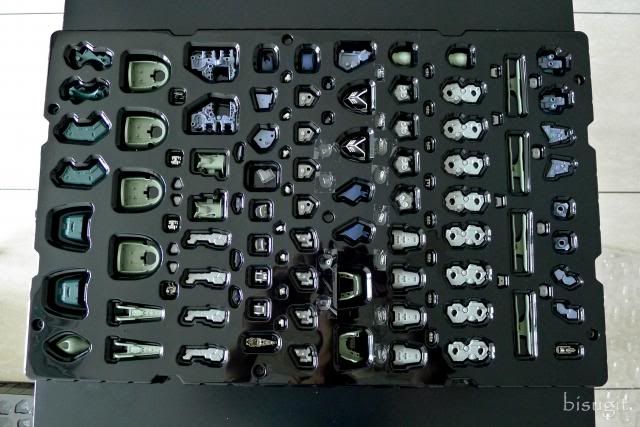
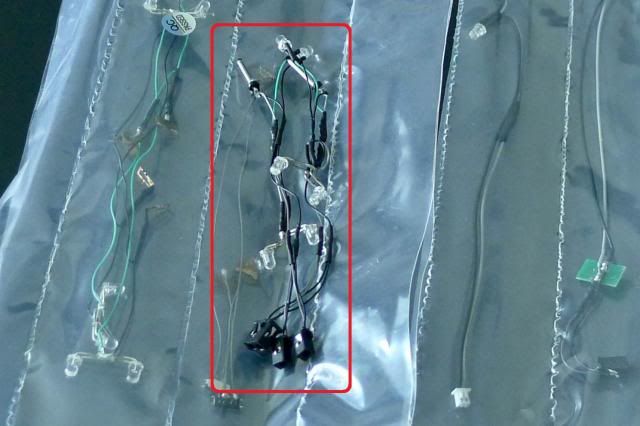
There are a total of 8 trays for the parts; trays A-H. There's a small white box containing the LEDs, wirings and battery. The photo etch and metal decals are taped on the surface of the underlying cardboard cover for trays. The limited premiums and the manual are stored under tray A.
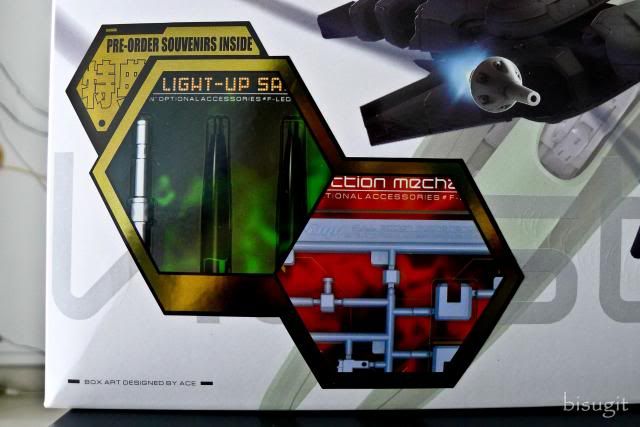
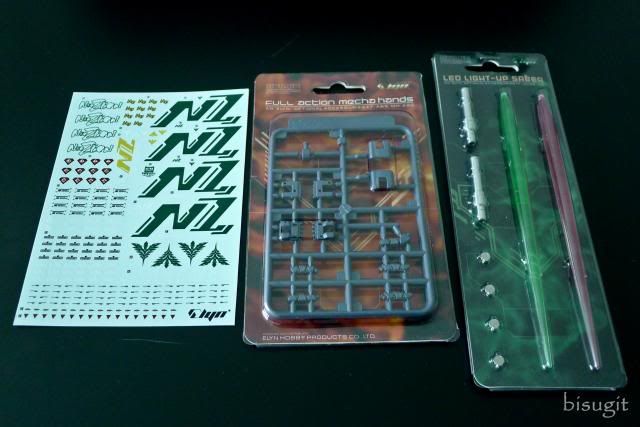
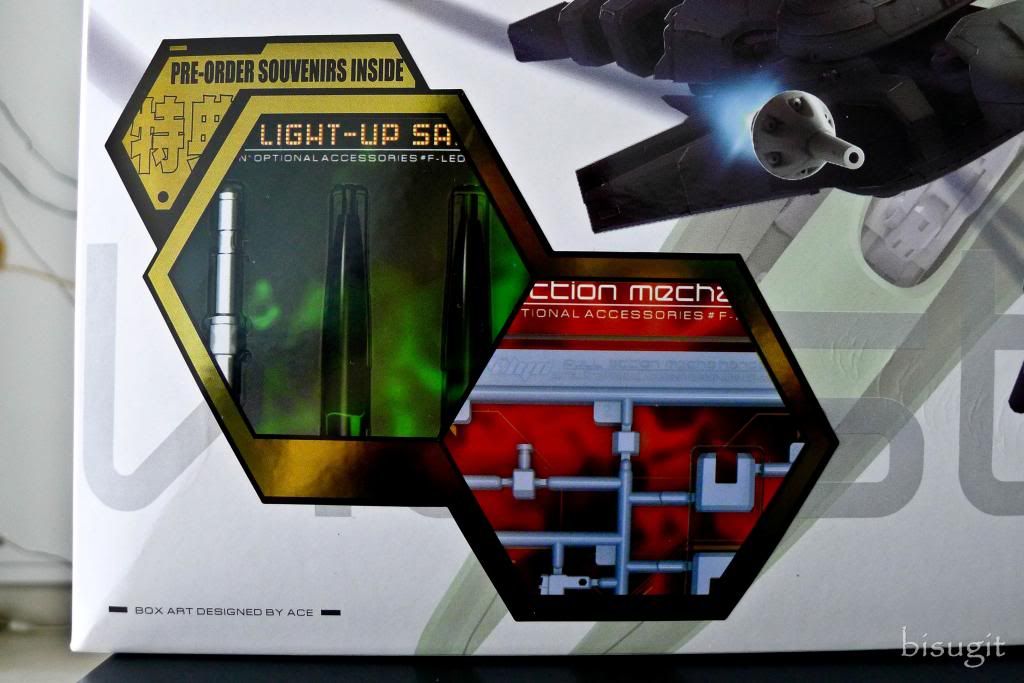
First production batch limited premium
|
 |
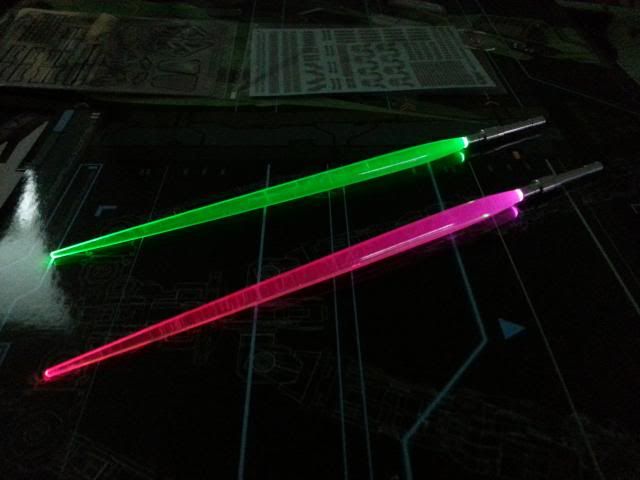 |
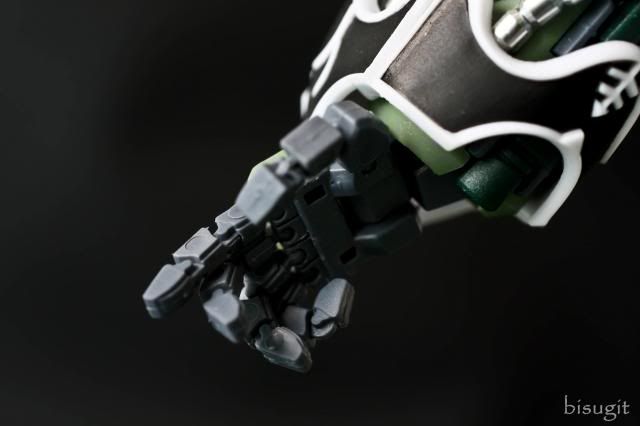
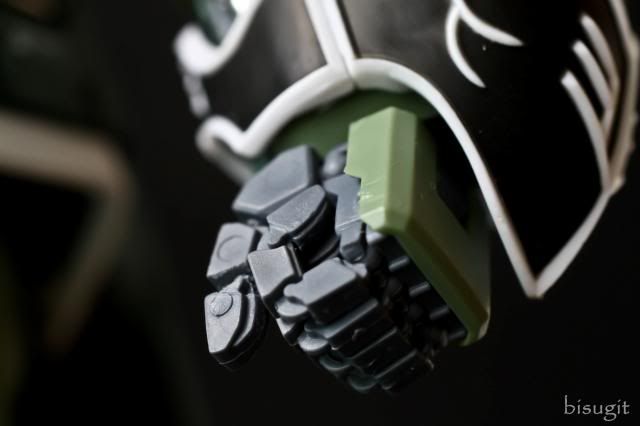
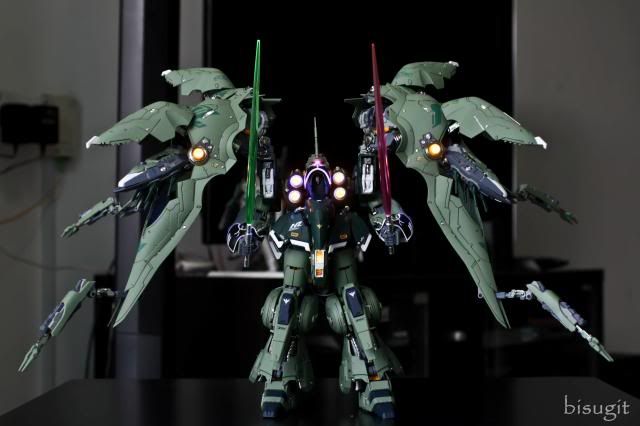
Customers who pre-ordered the initial release of Kastrysha will get 3 limited premiums. Extra identical waterslide decals, light up sabers (green and pink) and extra set of manipulators. You can probably live without those light up sabers and extra decals but you really need those set of mechanical 'hands'. The manipulators included in this kit looks too fragile and the one I have cannot even keep the thumbs intact. It cannot also hold the light up sabers given that they are a bit heavy because of the metal handle and 2 small batteries inside.
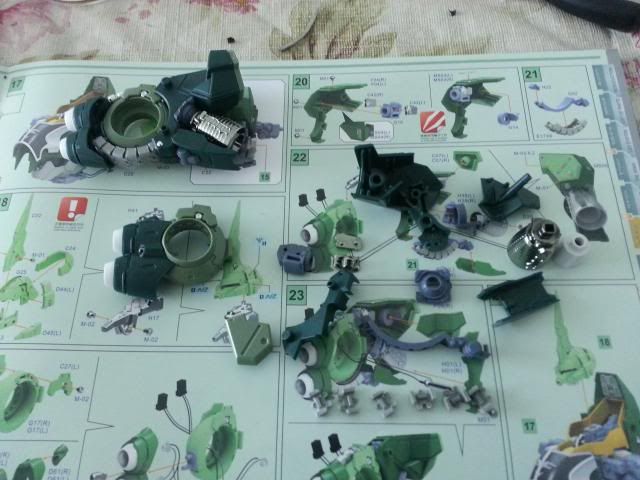
Work in Progress
 |
 |
 |
 |
 |
 |
 |
 |
 |
 |
 |
 |
 |
 |
 |
 |
 |
 |
 |
 |
 |
 |
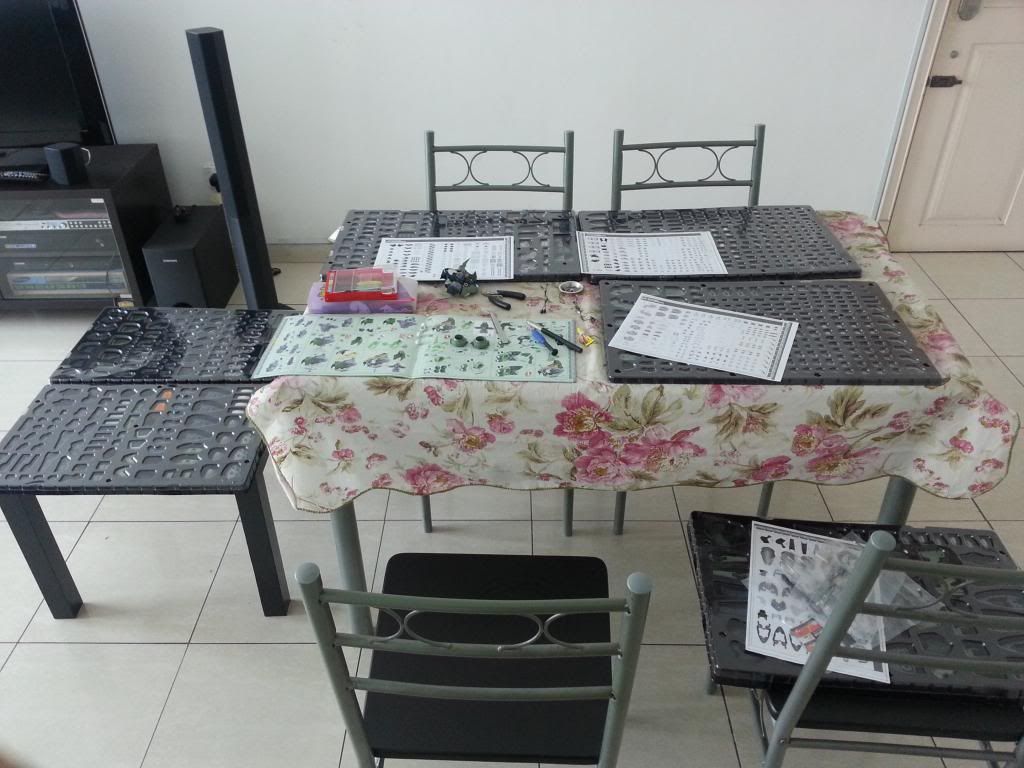
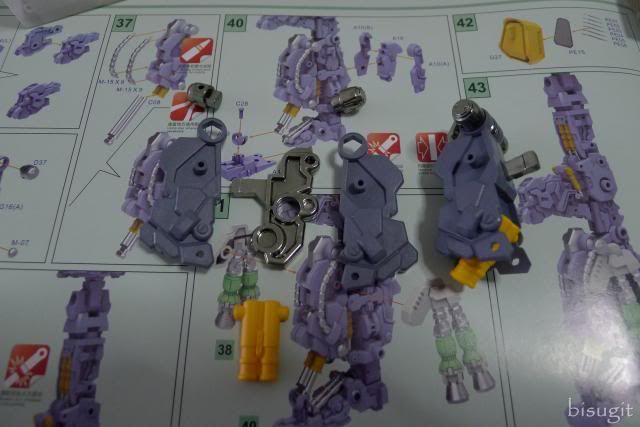
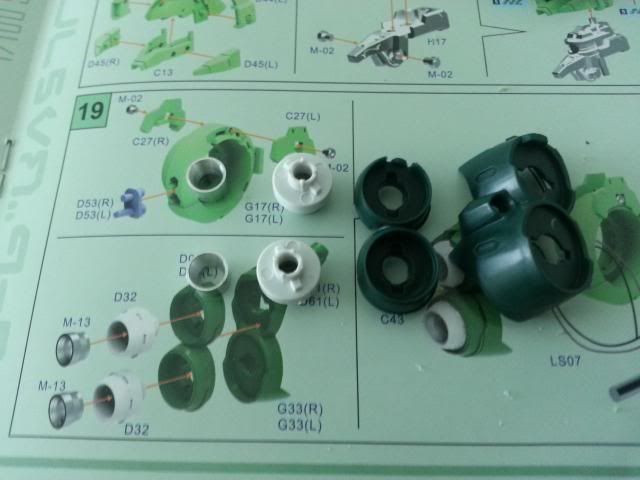
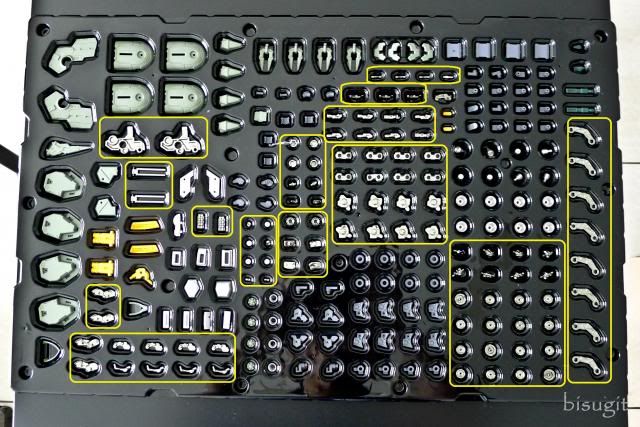
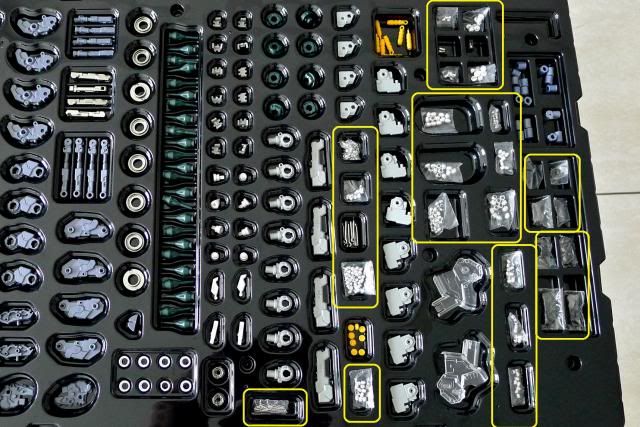
Unlike building the usual model kit, you need a big area to lay out all the trays so it would be convenient for you to take out the parts needed. The parts are not numbered on the tray, just in the manual only. So it's a bit frustrating to get all the parts you needed since you need to turn the pages of the manual every time you look for parts. So I photocopied those pages of the manual for parts numbering and placed them on their respective trays.
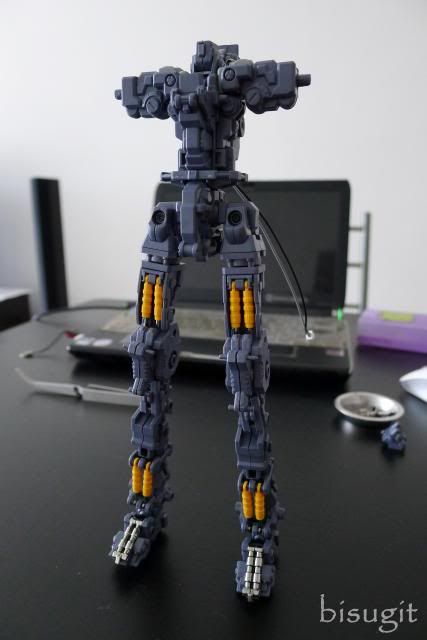
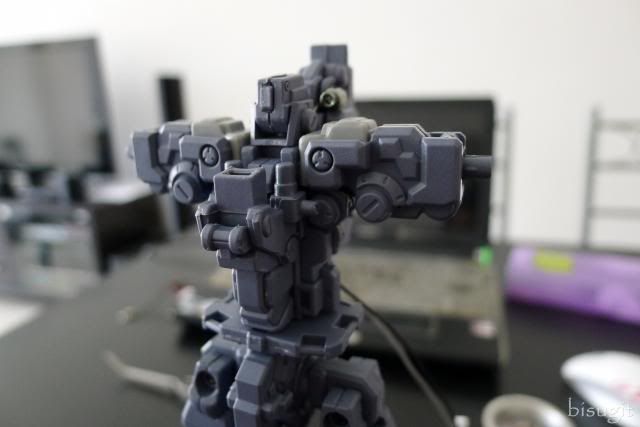
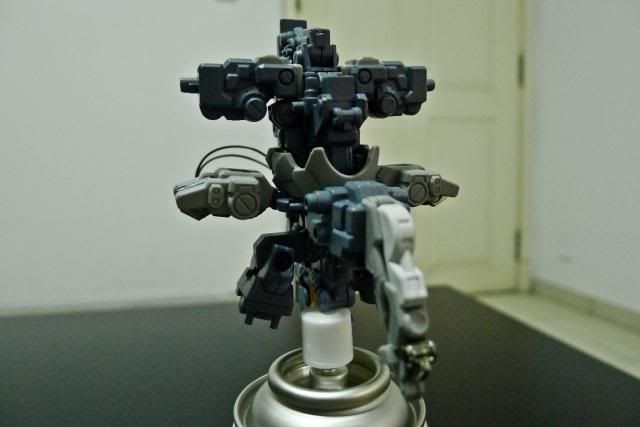
It's great that the frame is already built otherwise I would have spent additional hours building this kit. I am used to building Gundam model kits but this one is different, I've spent more time building this kit than any other perfect grade gundam out there. Maybe because I'm not yet familiar with Elyn's design or the kit really lives up to the tag 'Sophisticated plastic model kit'. Being a 3rd party product, there are imperfections on the plastic molds and fittings but that was already expected. You need to have a super glue or cement on stand-by because some parts fall off easily. No major problem though and I can say that this is one of the best 3rd party model kit (in terms of building the model itself) I've built so far.
Complications
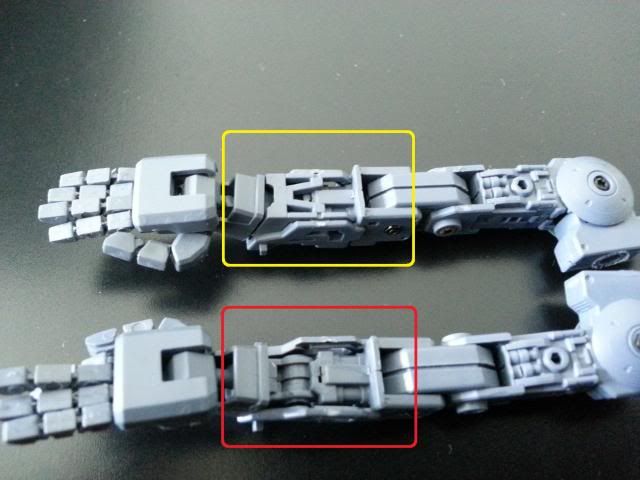
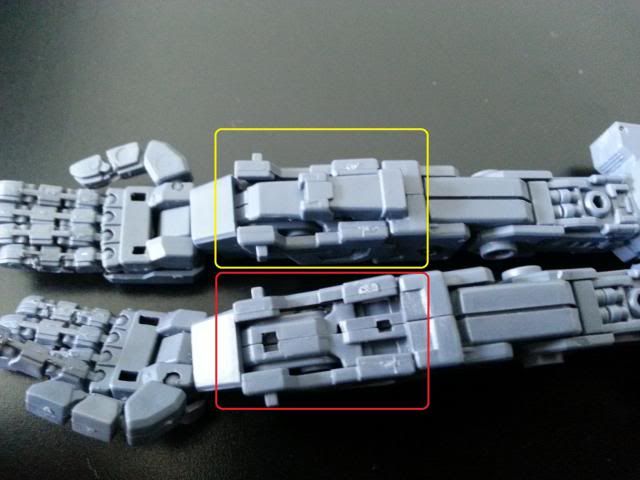
Missing Arm frame components
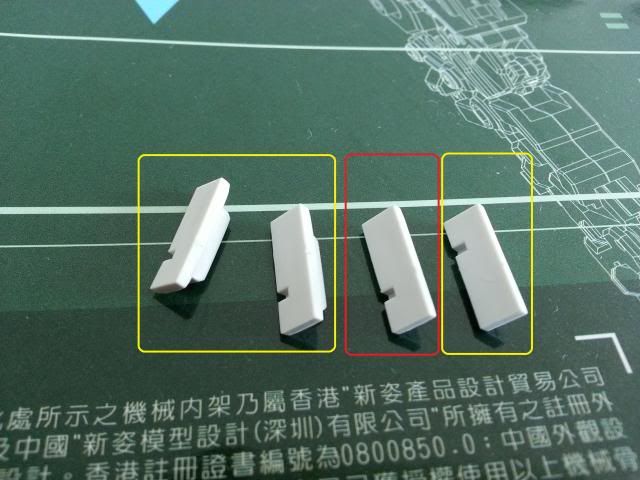
Switch cover should be 2 for left side and 2 for right side. Mine has 3 left and 1 right.
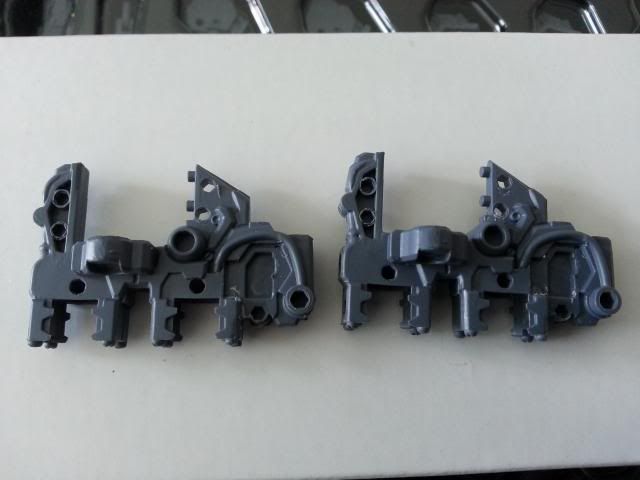
Shoulder frame both for right side
Chest LED sets both for right chest
According to the supplier, my problems with parts are not so severe because it is below 10 pcs. He was kind enough to replace the shoulder parts and the switch cover because he have the parts in his shop. I didn't bother with the missing components on the arm frame because it would be covered by the armor and I would have to wait around 45 days if I were to ask for a replacement because those parts are not available in the sellers shop. The chest LEDs is not much of a problem as I just need to bend the formation the other way to fit the left chest compartment properly. I also reversed the polarity of the LEDs as it is needed for the wiring configuration for the LEDs to work.
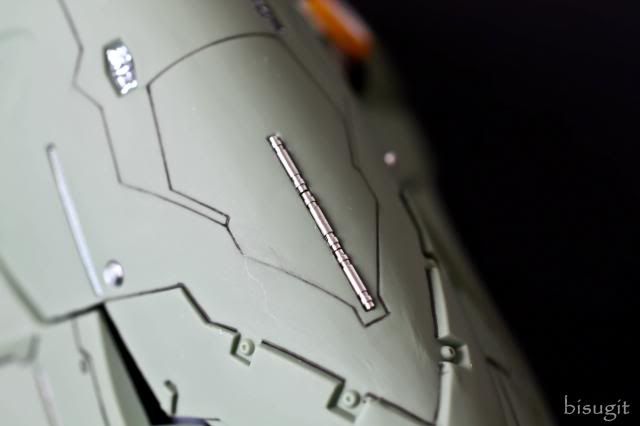
I'm happy they included these!
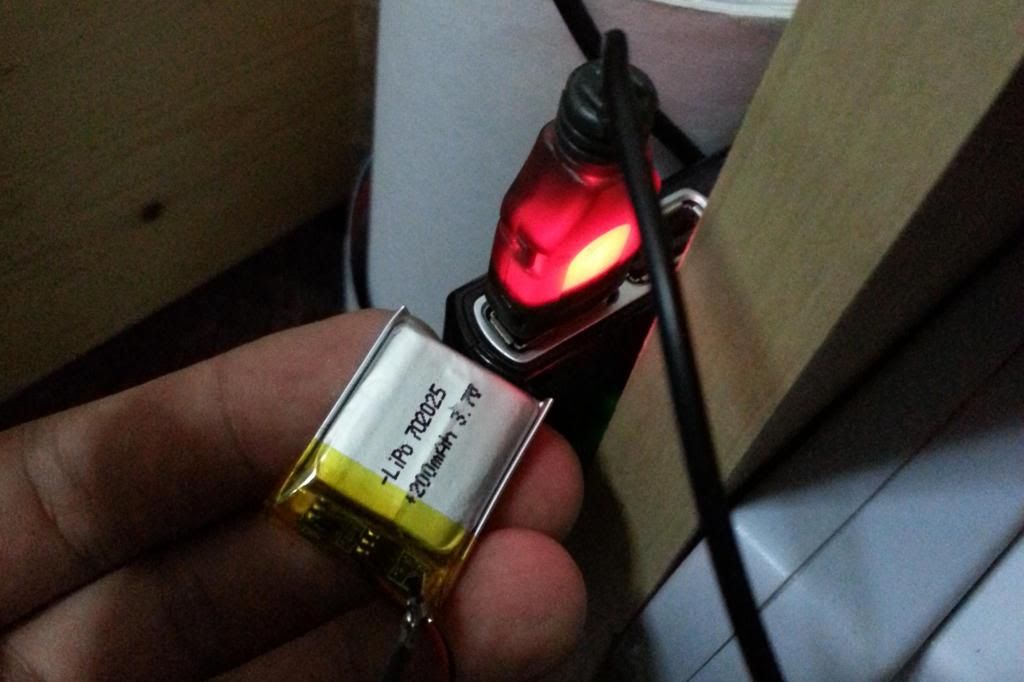
LiPo rechargeable battery and USB cable charger

A lot of chrome parts
A lot of metal parts for details
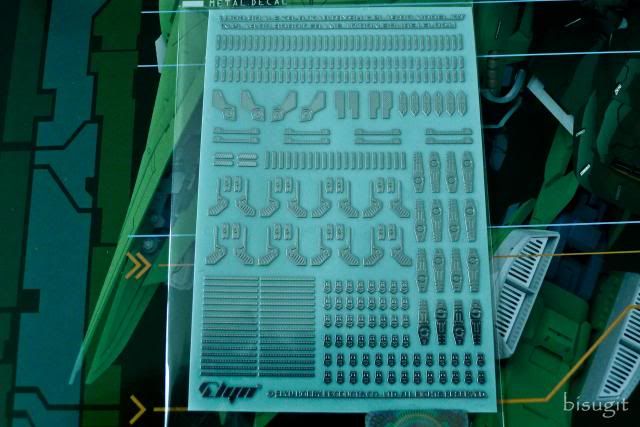
Metal decals
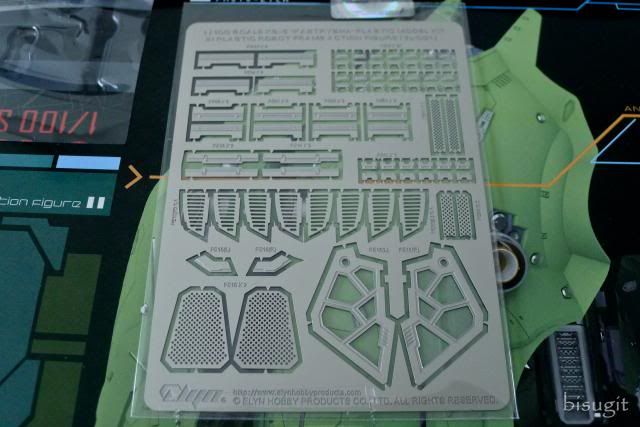
Photo etched parts
I was really surprised to see all of these included in this kit. These extra parts make the tag price reasonable if not, more than worth it. The nice feature about the usb cable charger is that it lights up while the battery is charging and turns off when the battery is full. You have the option of plugging it into the usb port of a computer or use an iphone or samsung galaxy chargers, any chargers that has a 5V output should be ok. The metal decals included are twice the number of what you needed for the kit so you will still have extra decals as a backup. The photo etched parts are a very nice touch to a highly detailed kit. The metal details makes this kit even more awesome.
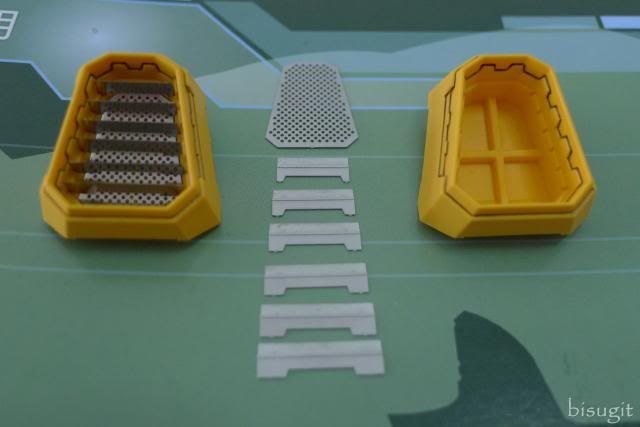
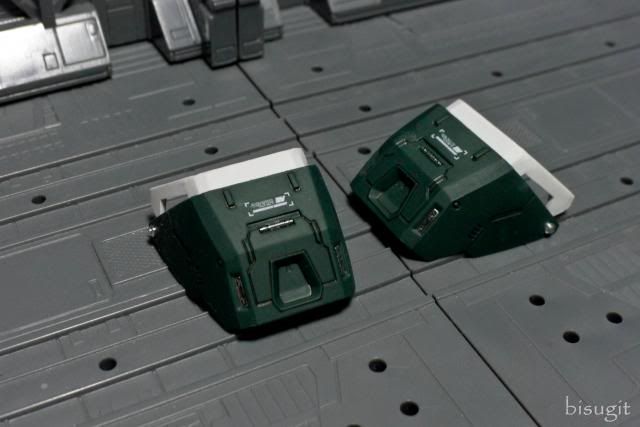
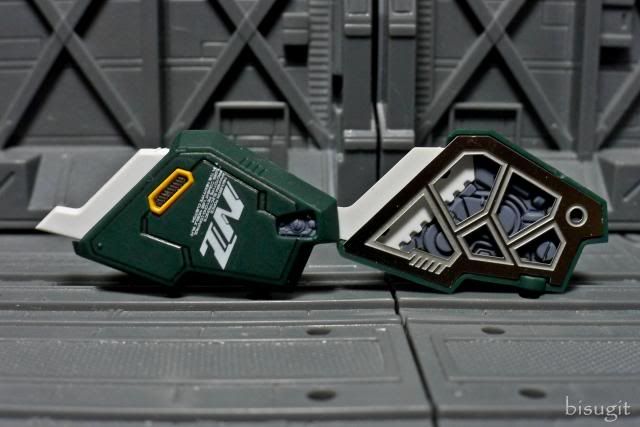
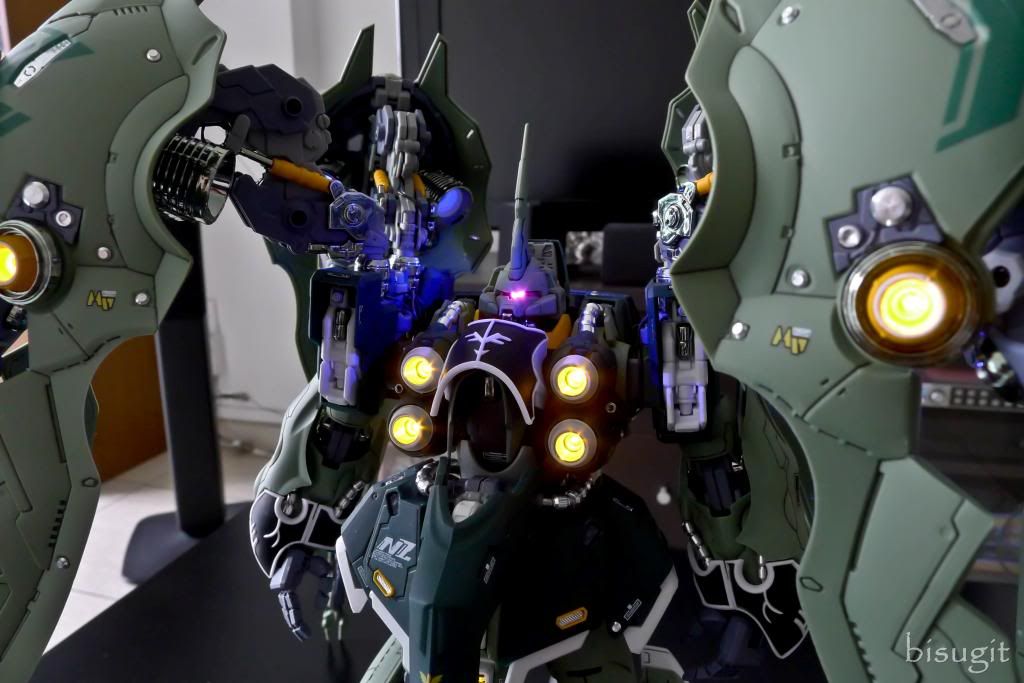
Switches
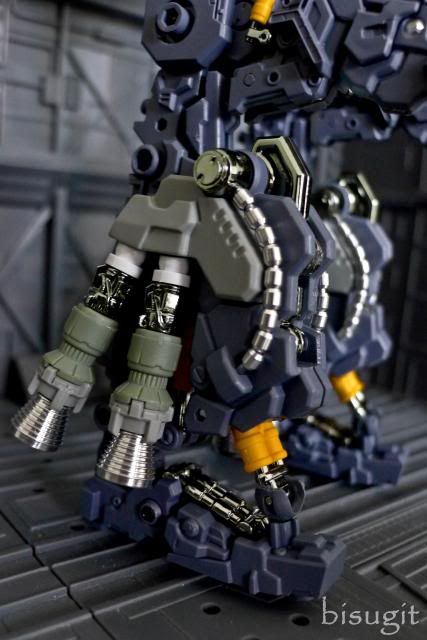
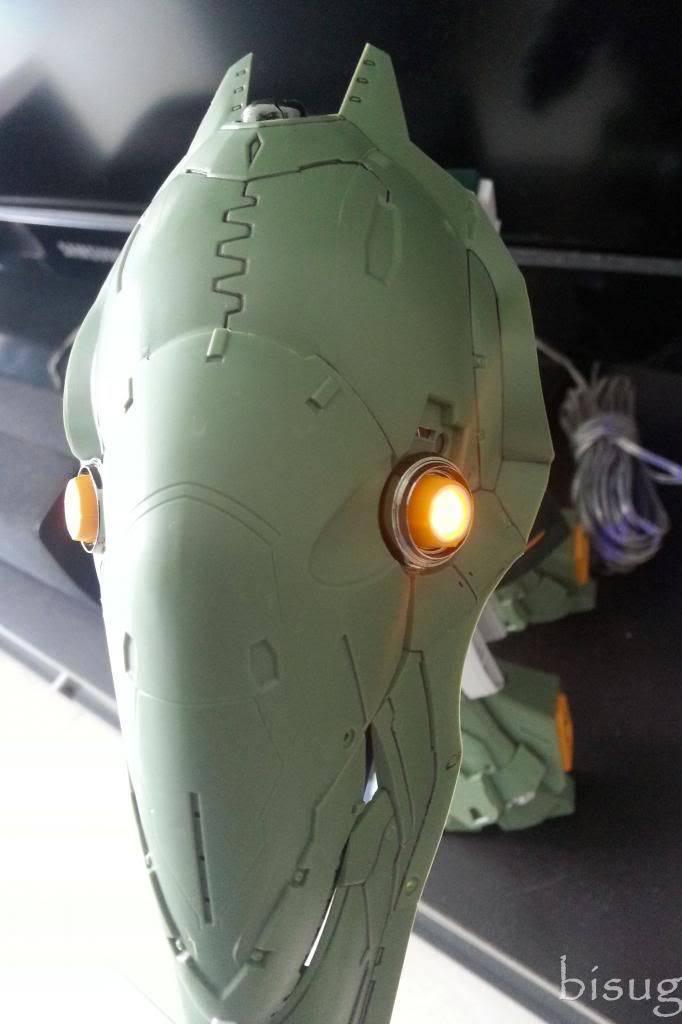
There are only 3 switches for this kit. First is located on the rear skirt which also houses the LiPo battery. This set up handles the LEDs for the mono eye, chest, backpack booster, crotch and binders. The other 2 are located on the side of the knees which holds the batteries and controls the LEDs for the mid leg thrusters. both are powered by 2 LR41 batteries
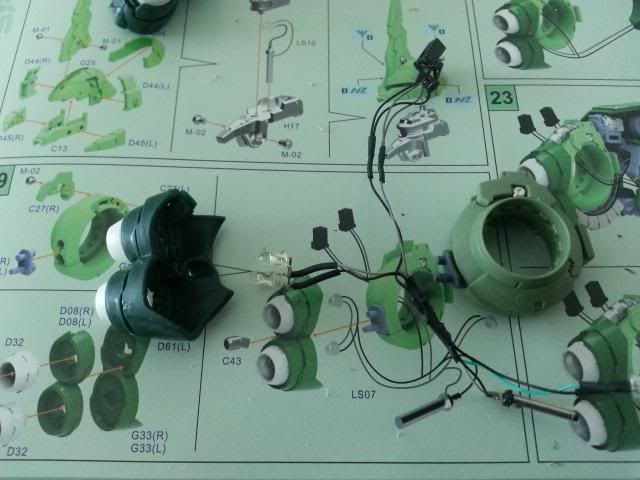
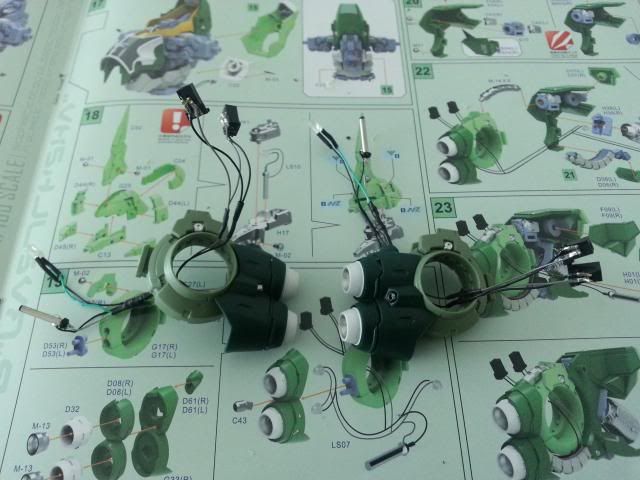
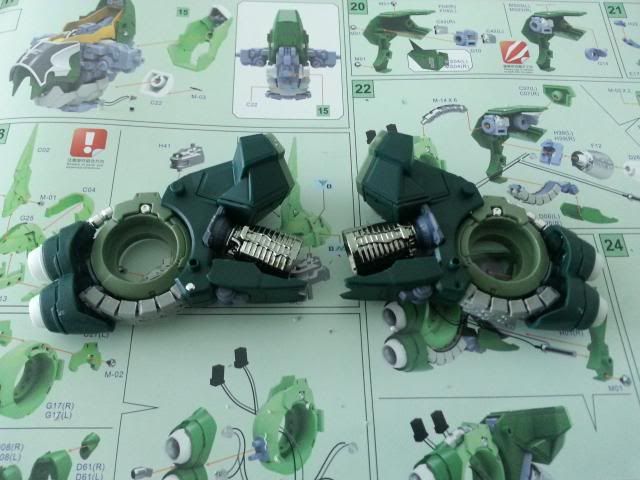
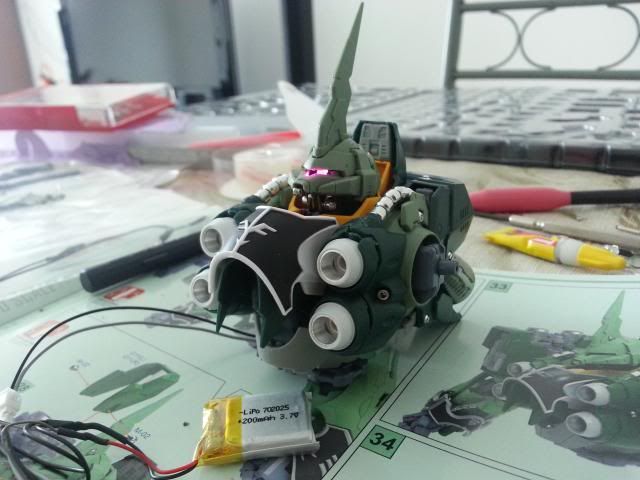
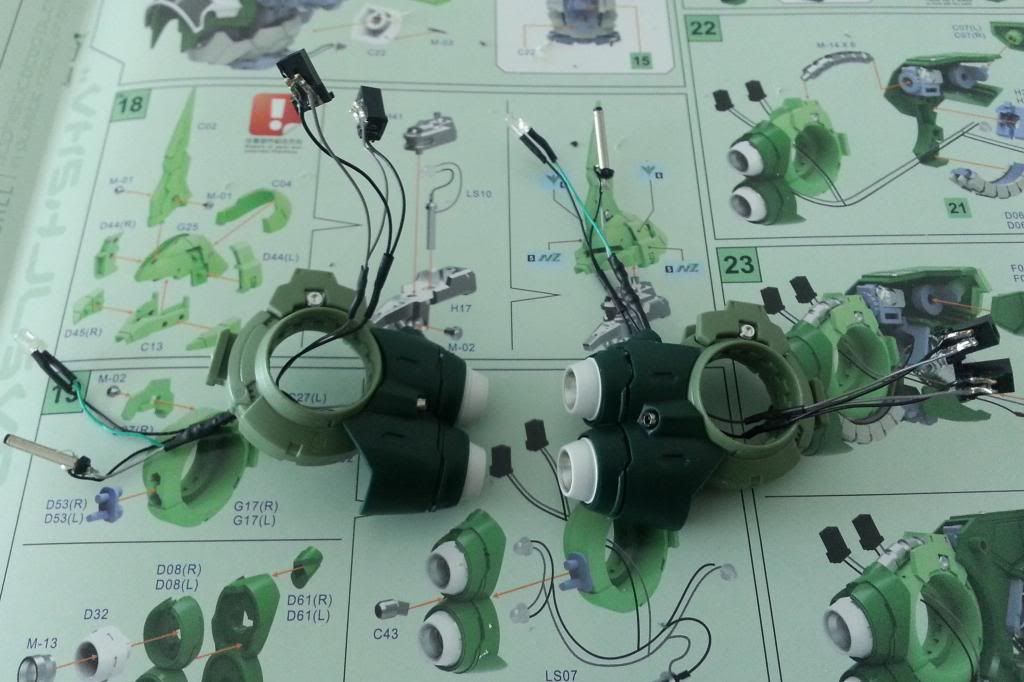
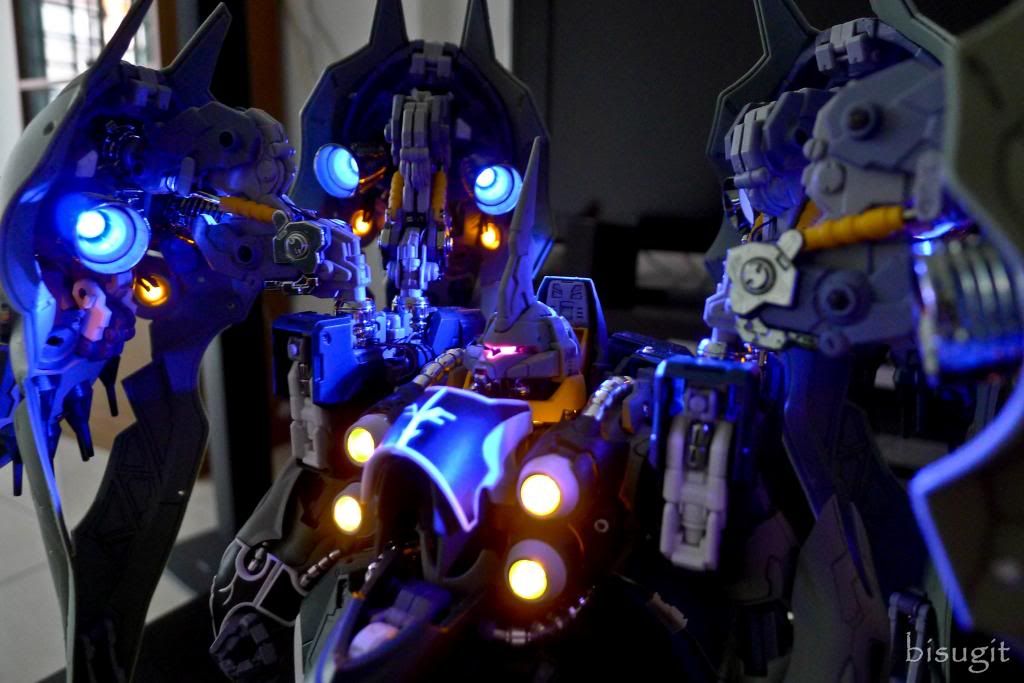
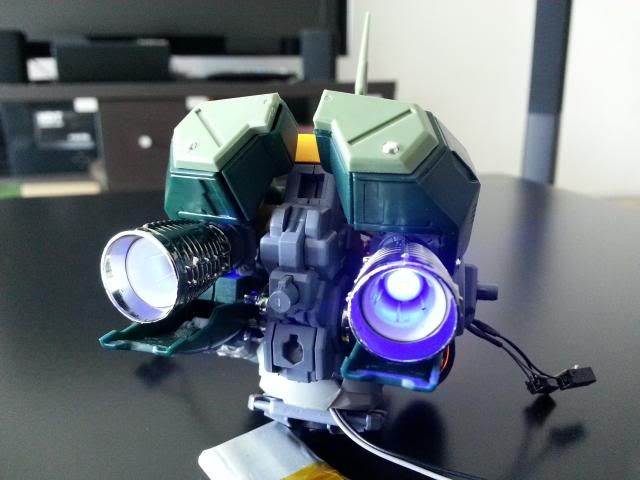
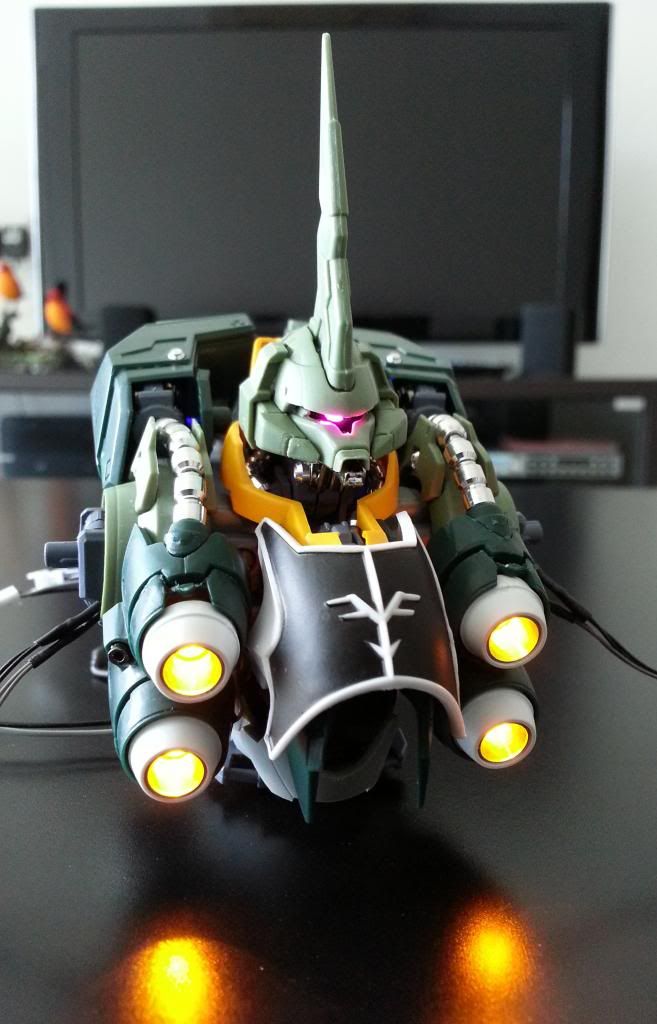
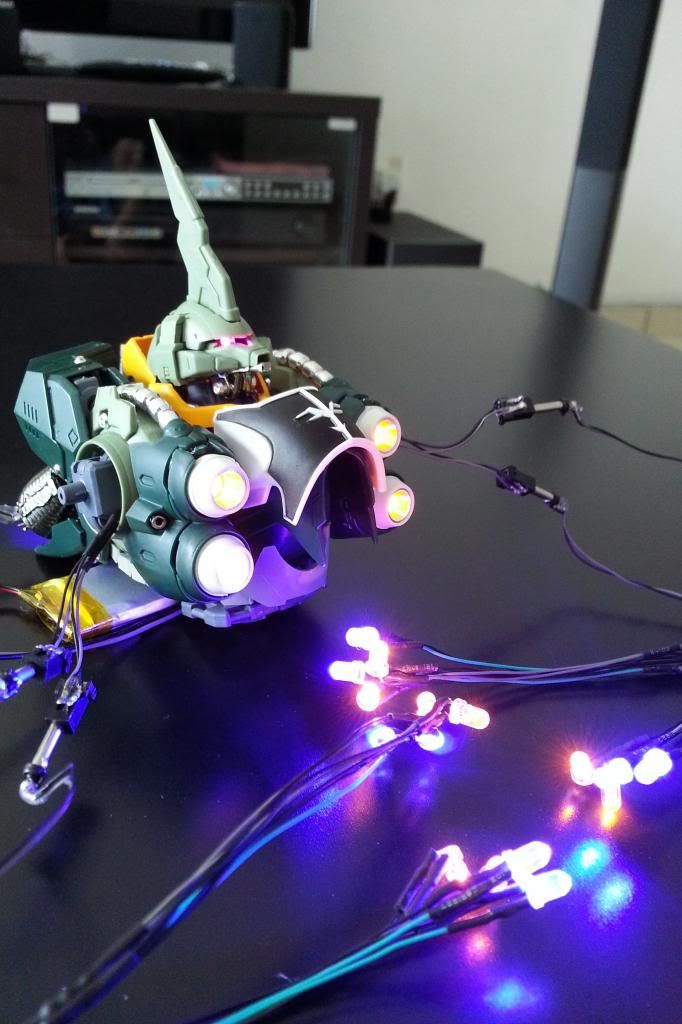
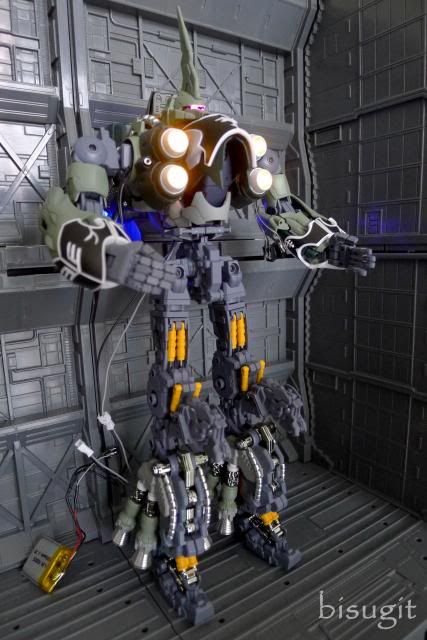
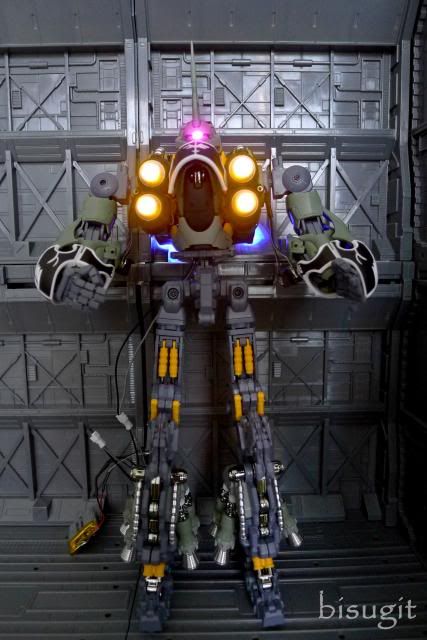
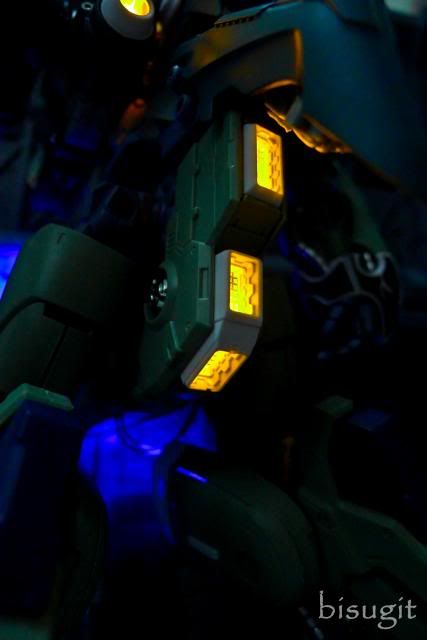
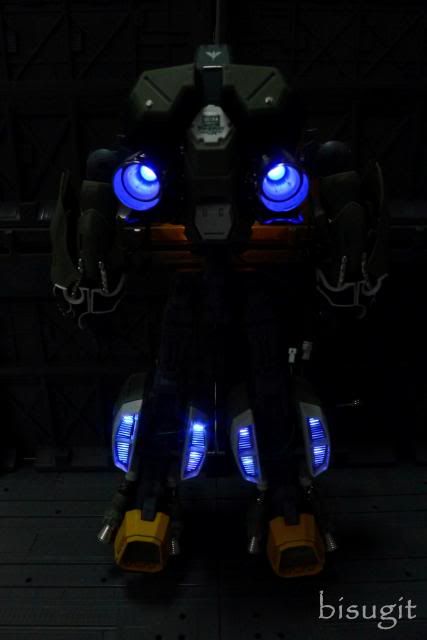
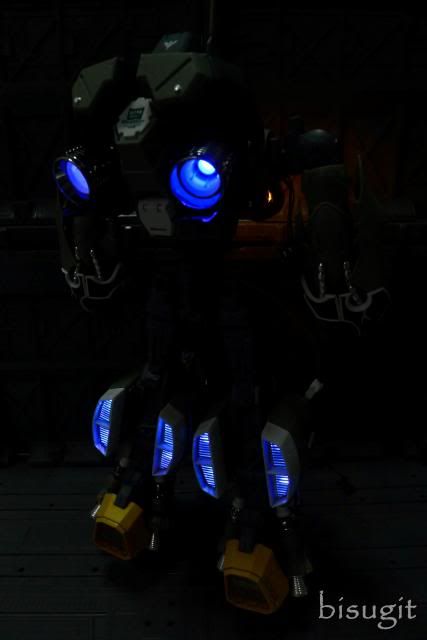
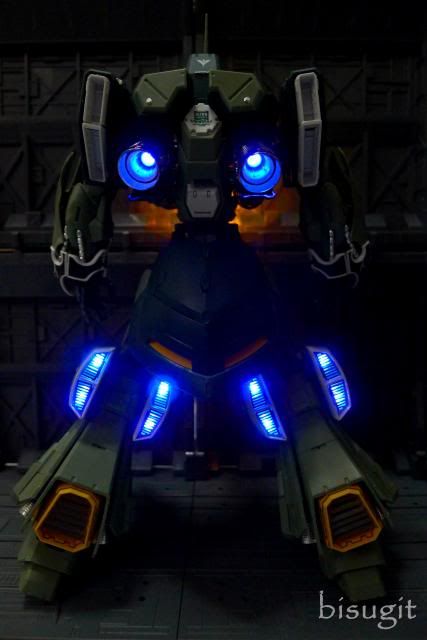
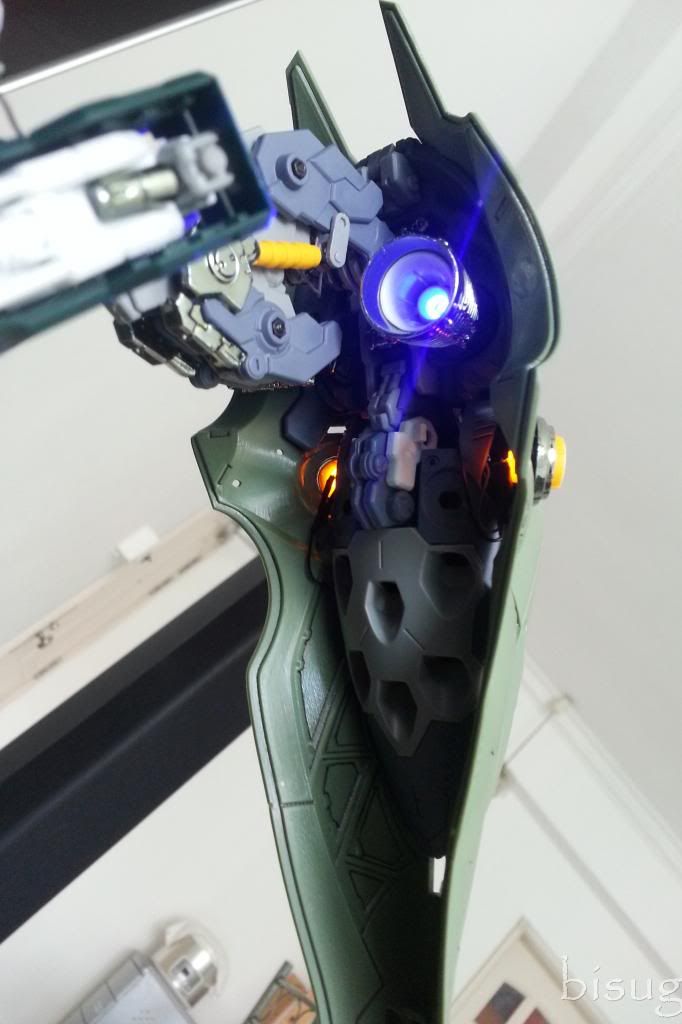
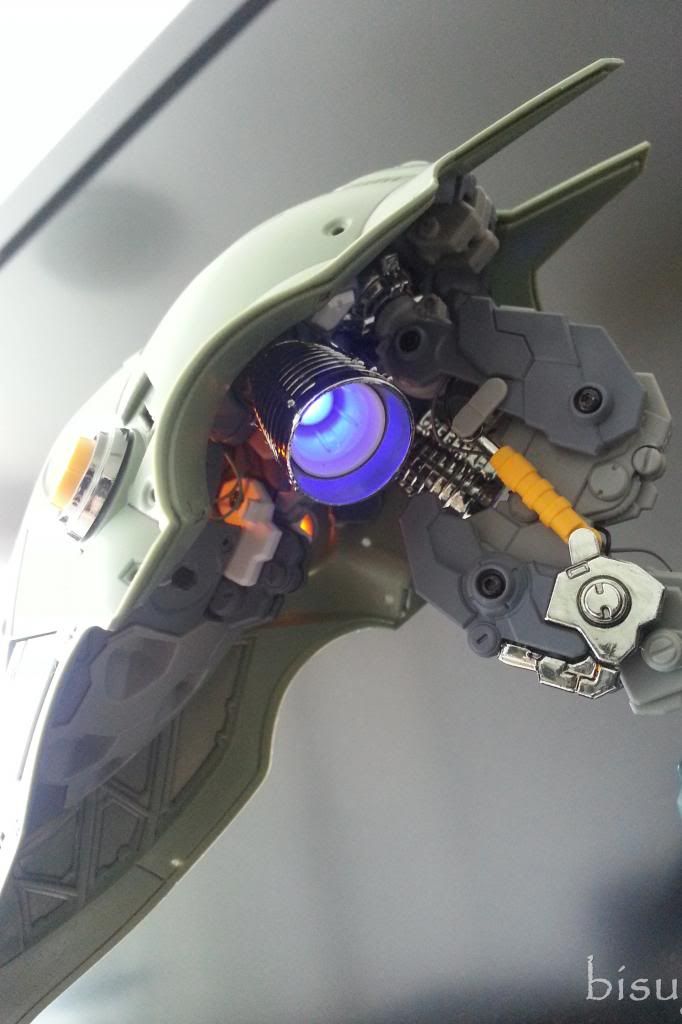
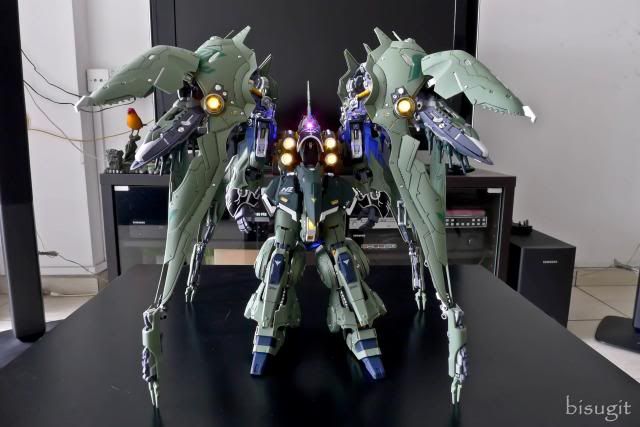
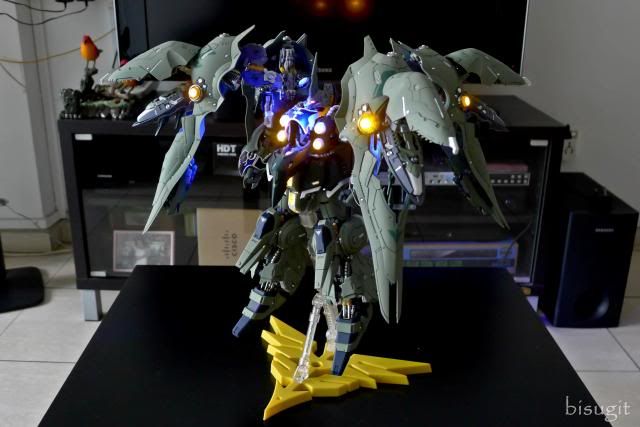
LEDs installed
 |
 |
 |
 |
 |
 |
 |
 |
 |
 |
 |
 |
 |
 |
 |
 |
 |
 |
 |
 |
 |
 |
 |
 |
 |
 |
 |
 |
 |
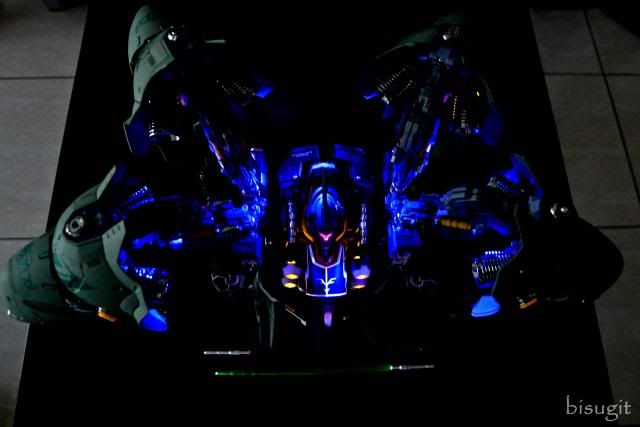 |
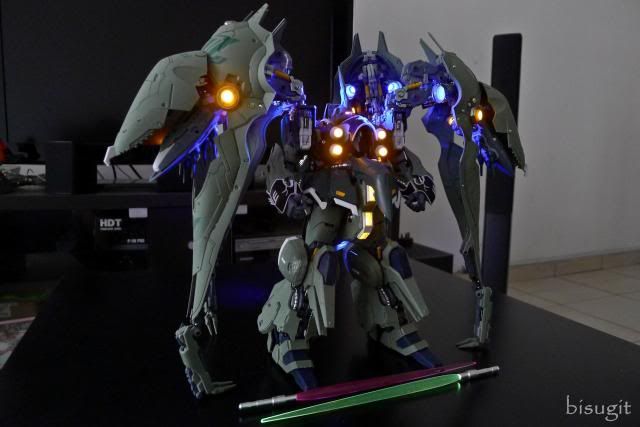
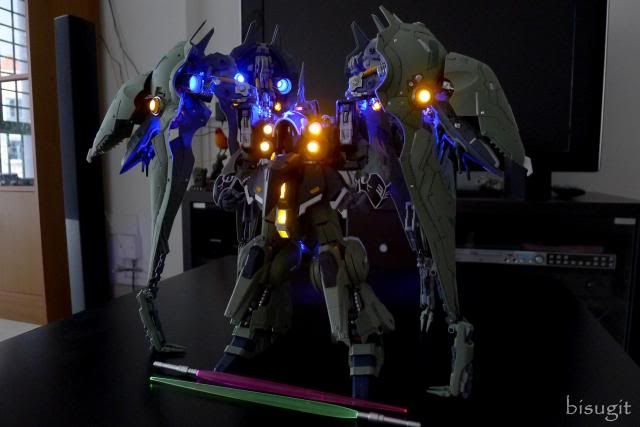
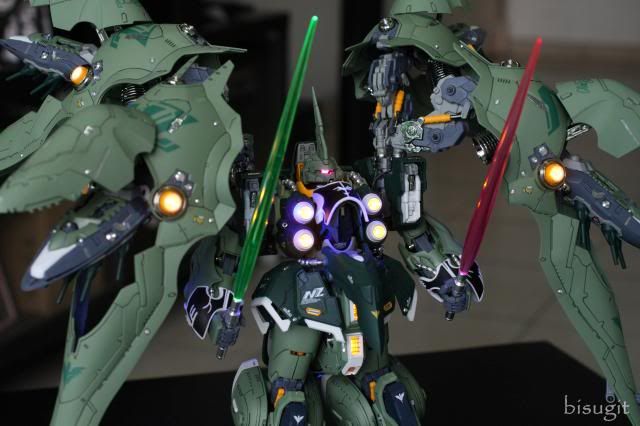
Let me just say that this is not a miniature Christmas tree :-) I've never installed this much LED on any model kit. The overall time I've spent finishing this kit, half of it was just installing the LEDs. One might say that its pretty straightforward since the instructions can be easily followed and the circuit design is pretty simple (of course it's just an LED, 2 wires and a battery). Problem is how you are going to fit all those LEDs and wirings properly. I had to drill, cut and glue some parts to make the wirings fit properly and I've managed to break some wires from their connections so I had to solder them back.
Finishing Touches
 |
 |
 |
 |
 |
 |
 |
 |
 |
 |
 |
 |
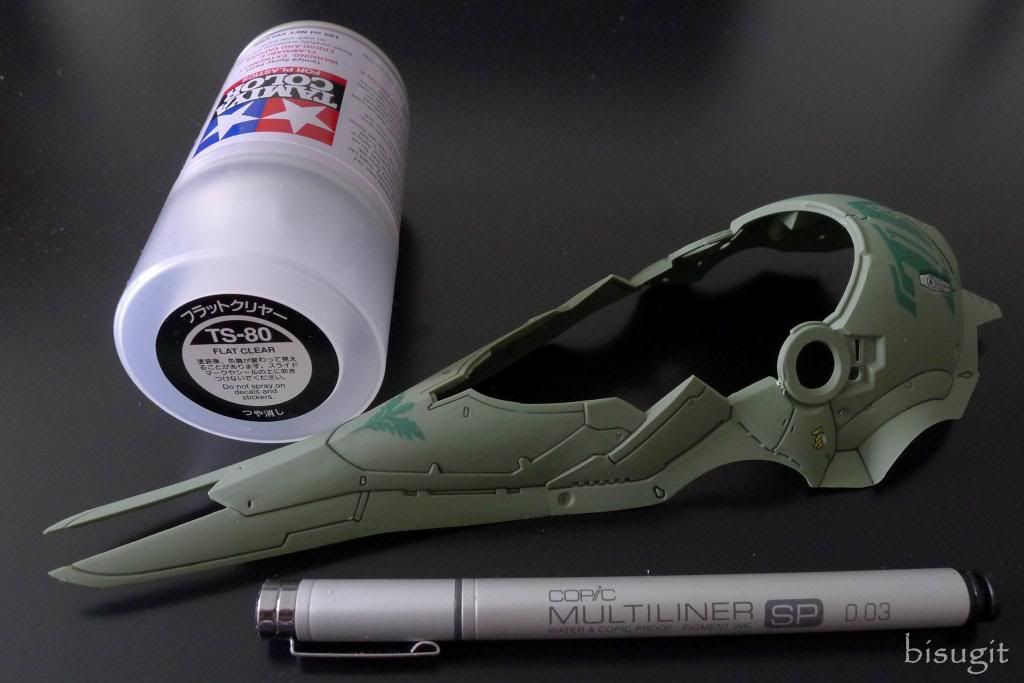
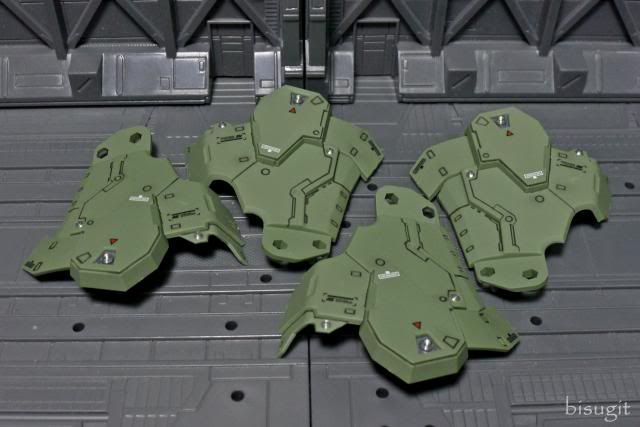
I only used Tamiya Flat Clear and 0.03 Copic marker to detail up this kit. I wanted to paint it but it would take a lot of time and since the color separations for plastic parts are almost accurate, I am fine with using only the flat clear coat. I used panel wash technique in the beginning but decided to use a marker instead since I'm too lazy to apply a gloss clear coat.
The Invaluable Tool
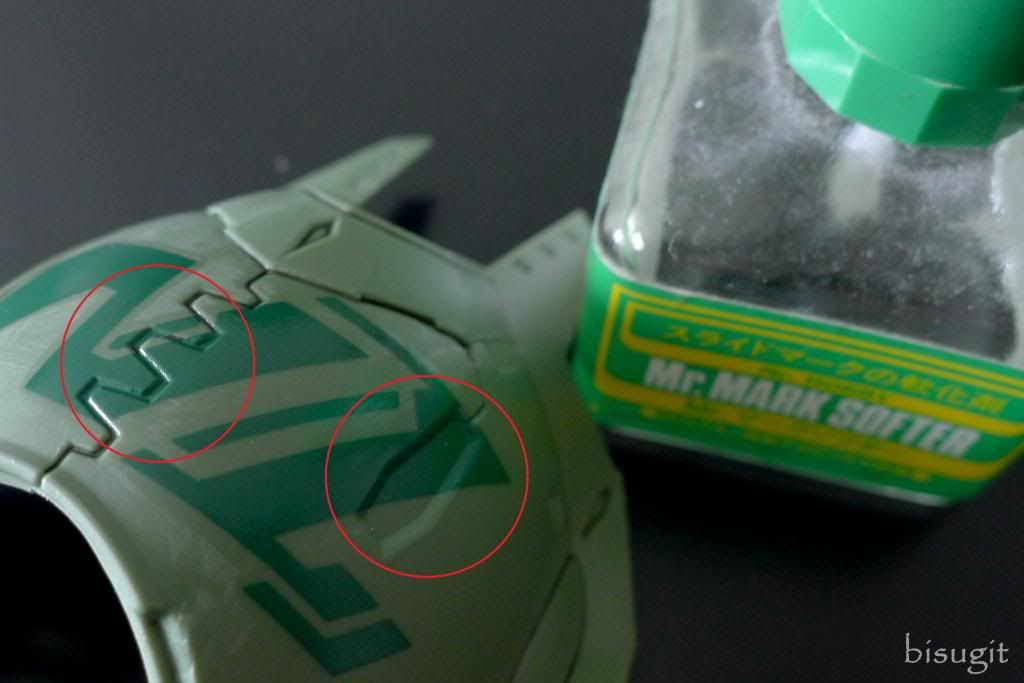
There are sufficient amount of waterslide decals included in this kit. A lot of them are usually small but there a a couple of big decals such as those for the binders. And it's a must that you use Mr. Mark Softer after applying these decals so as to make the decals follow the contour of the surface and make them 'hug' those corners and deep grooves. Don't be afraid about tearing the decals as they are one of the toughest waterslide decals I've handled so far.
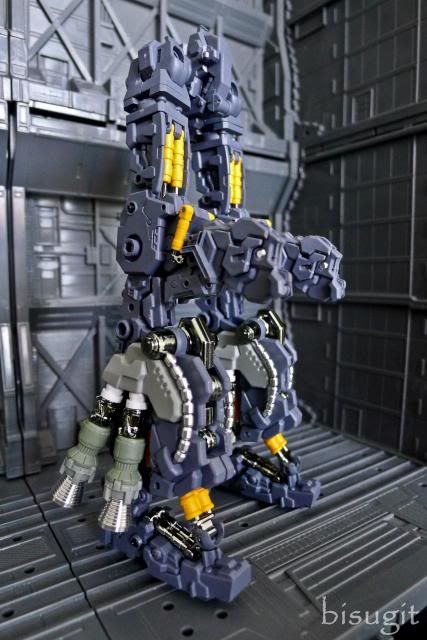
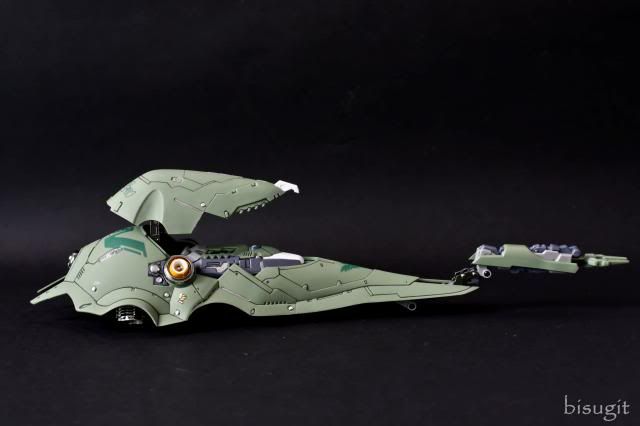
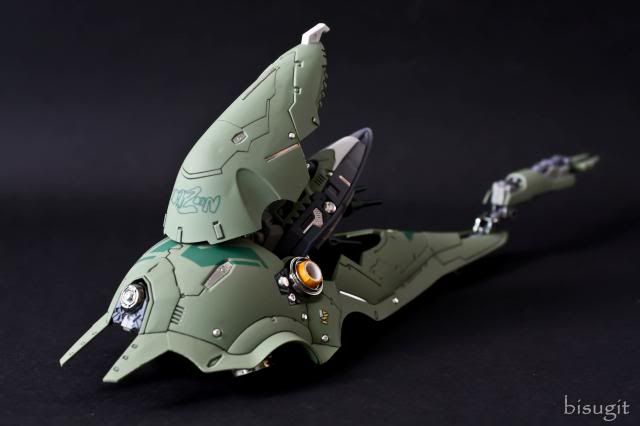
360° View (Main Body)
 |
 |
 |
 |
 |
 |
 |
 |
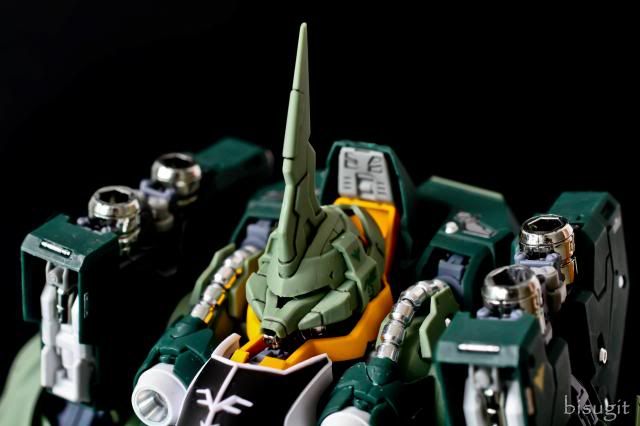
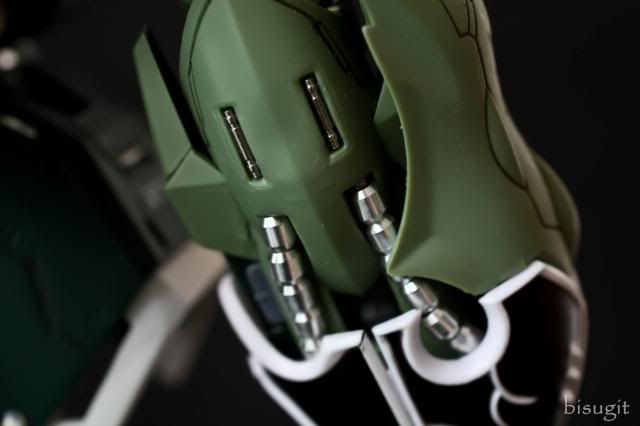
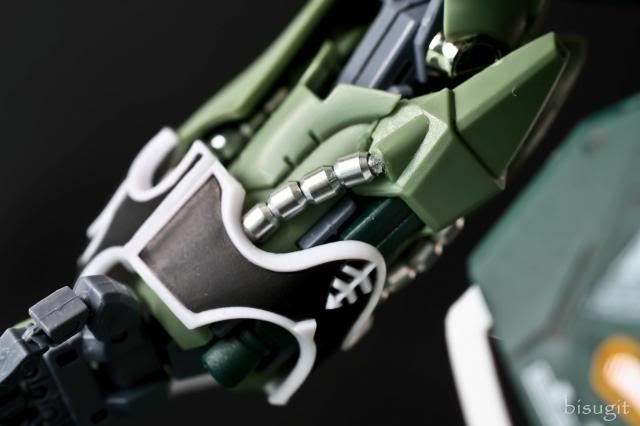
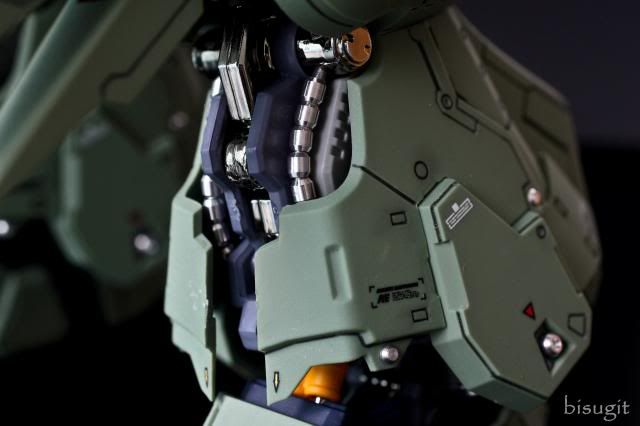
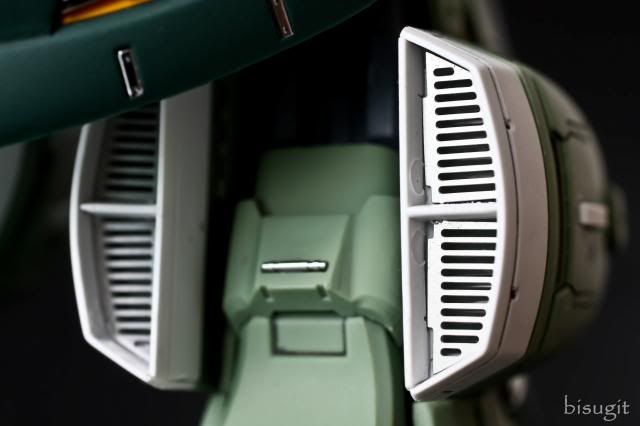
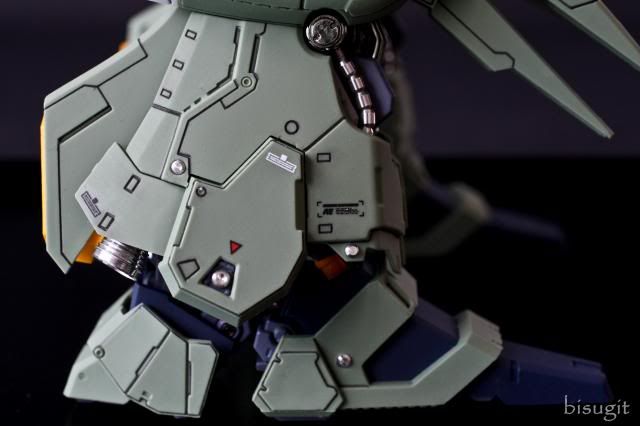
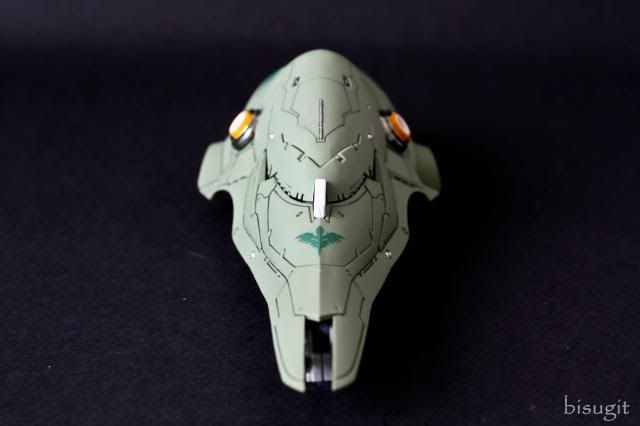
A Closer Look
 |
 |
 |
 |
 |
 |
 |
 |
 |
 |
 |
 |
 |
 |
 |
 |
 |
 |
 |
 |
 |
 |
 |
 |
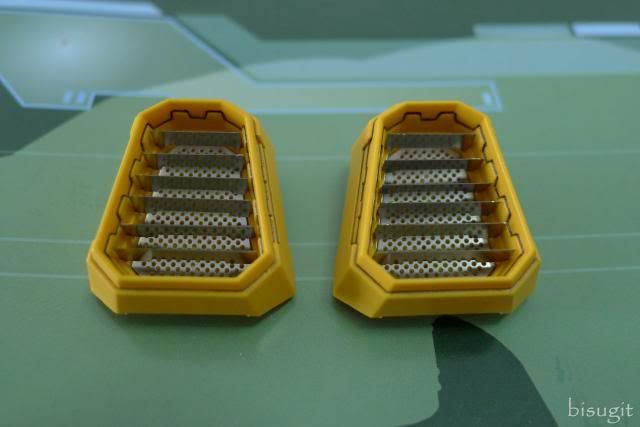
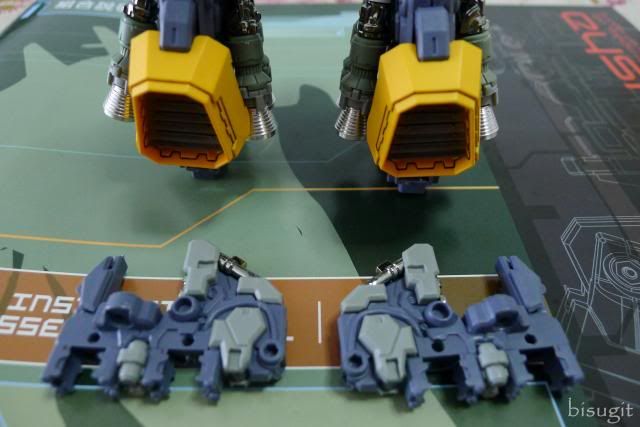
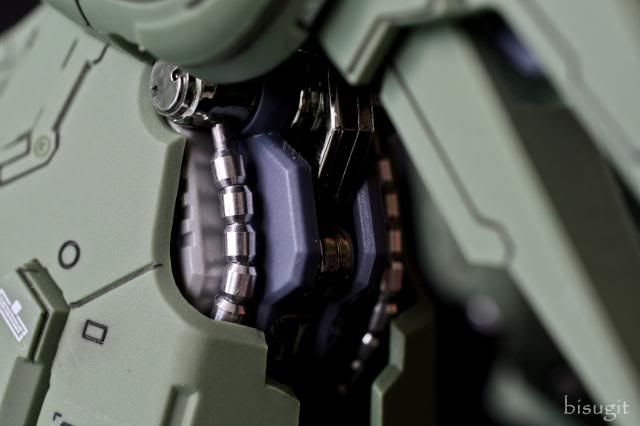
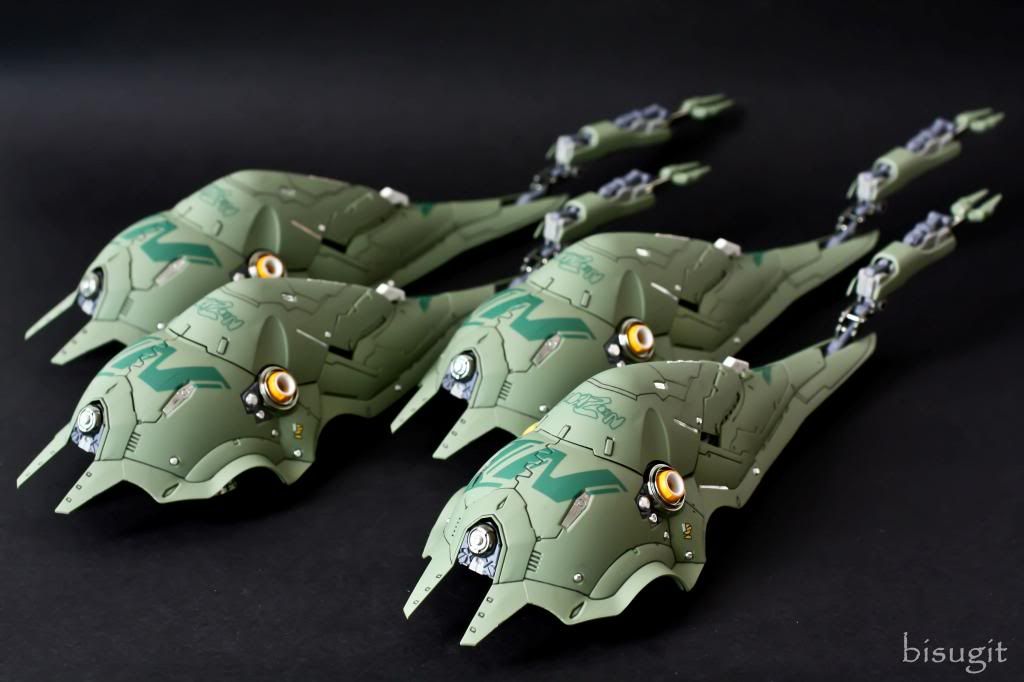
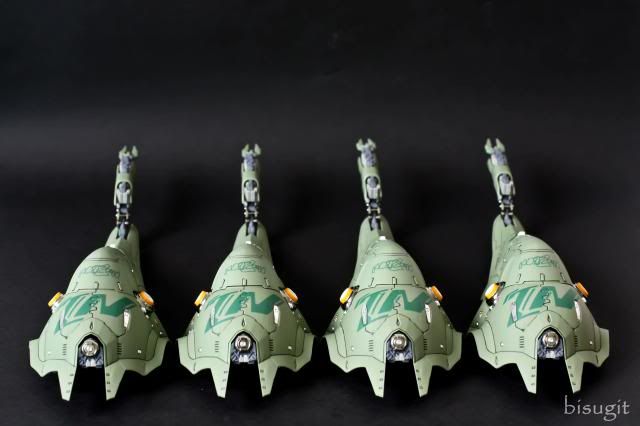
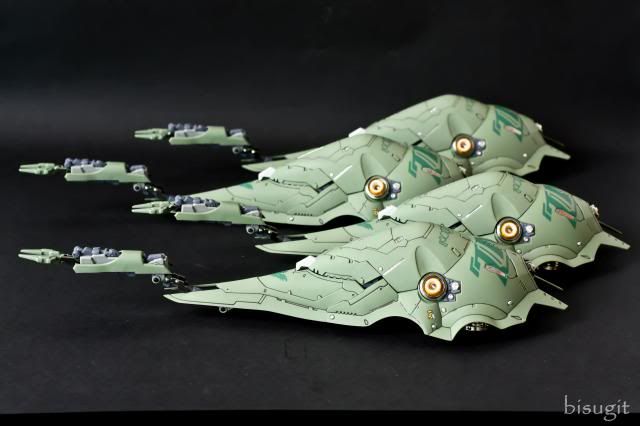
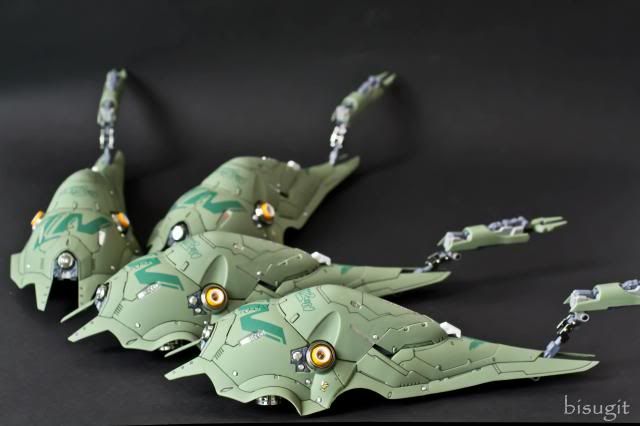
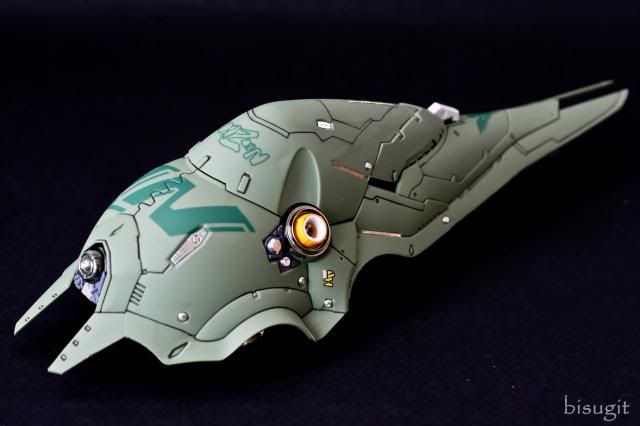
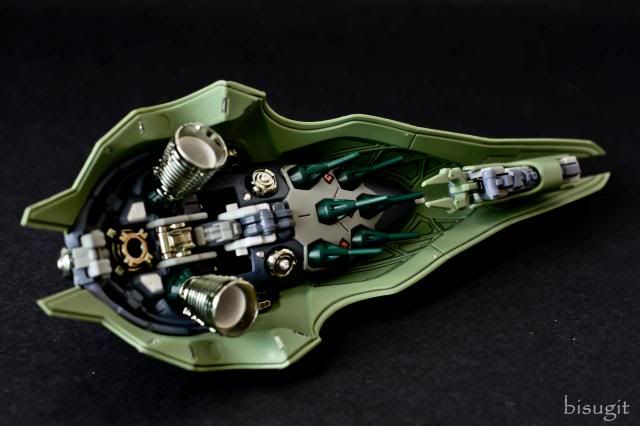
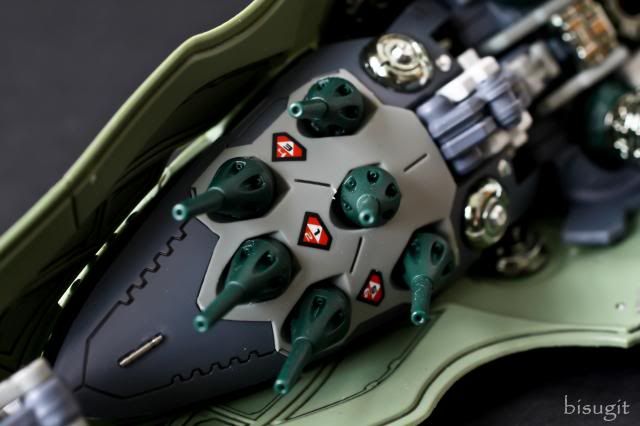
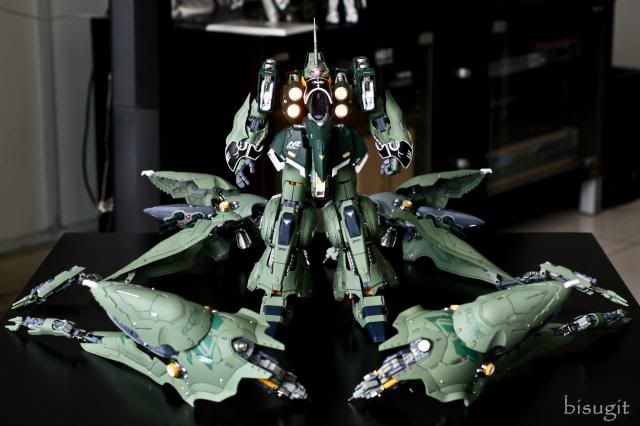
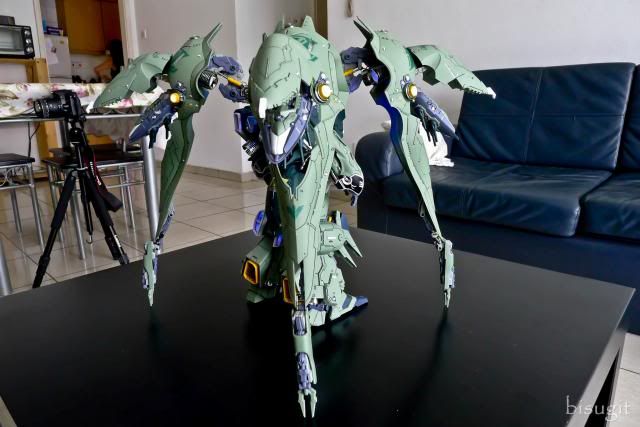
No, They Are Not Giant Caterpillars!
 |
 |
 |
 |
 |
 |
 |
 |
 |
 |
 |
 |
 |
 |
 |
 |
 |
 |
 |
 |
 |
 |
 |
 |
 |
 |
 |
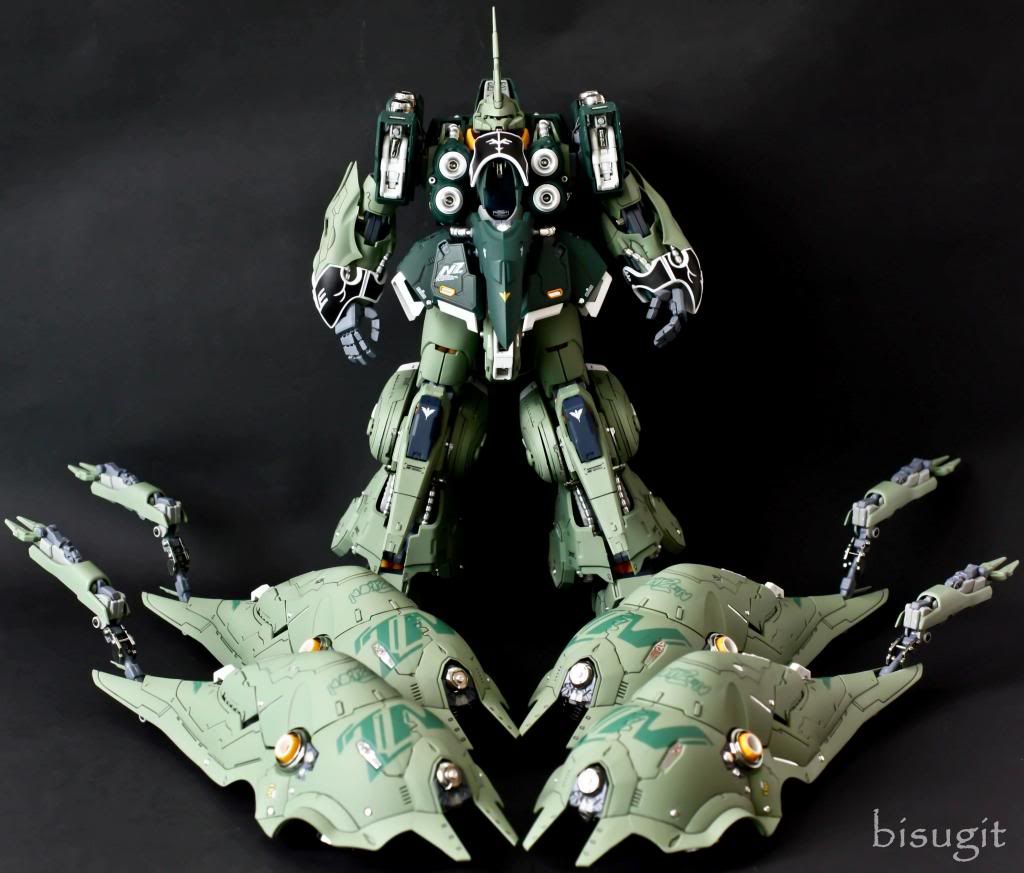
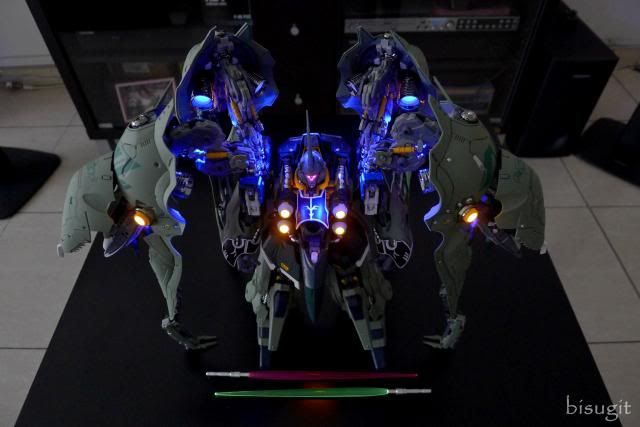
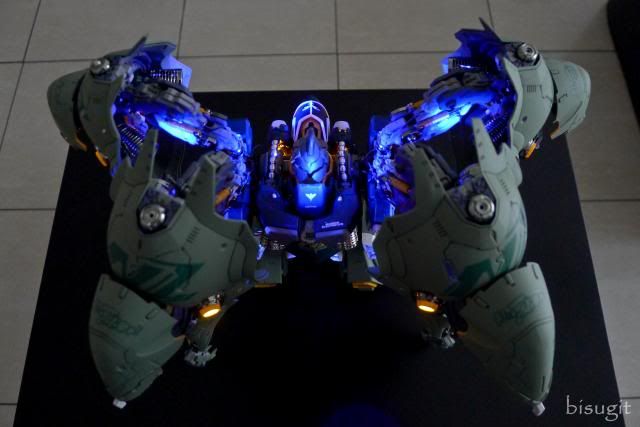
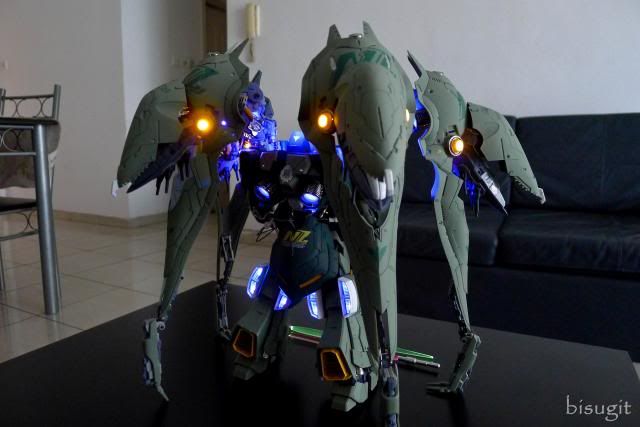
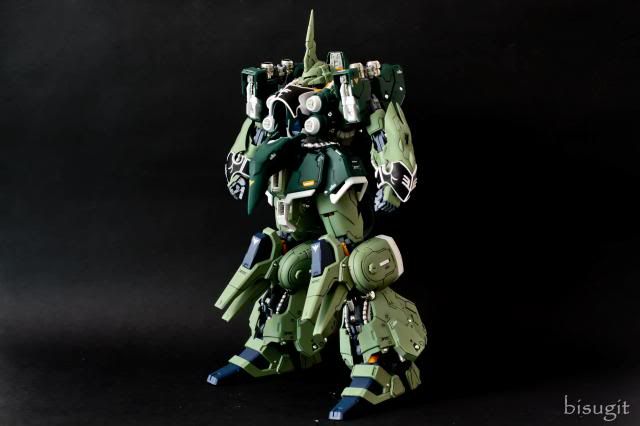
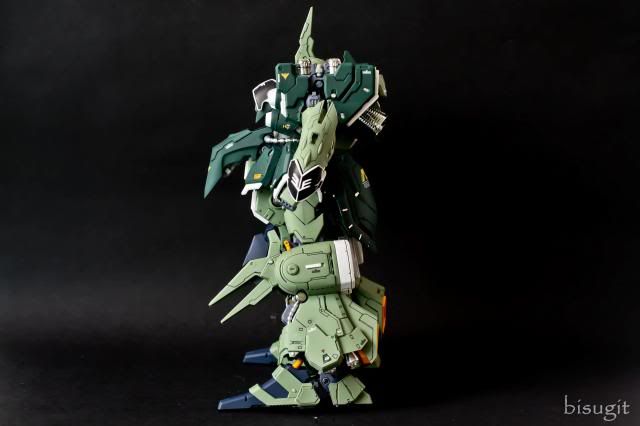
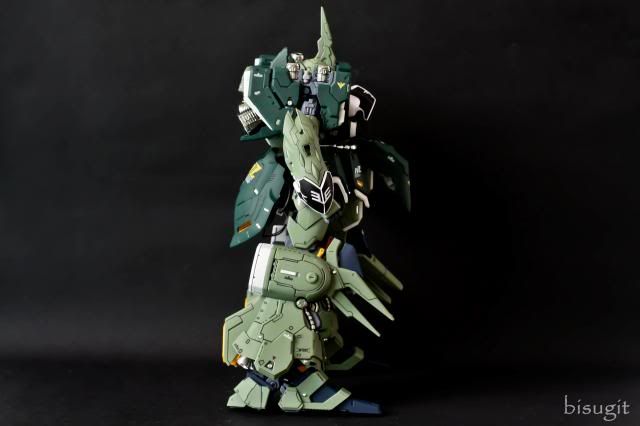
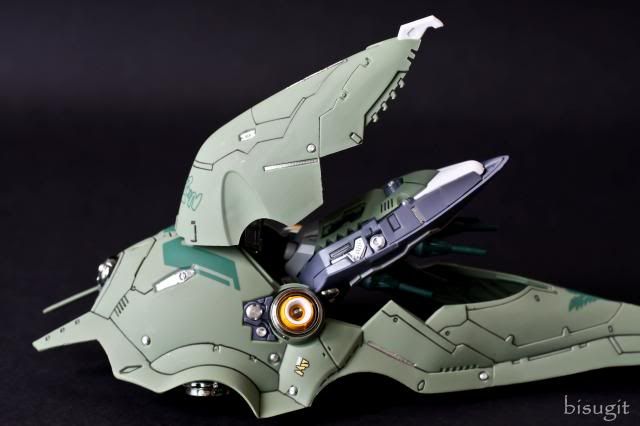
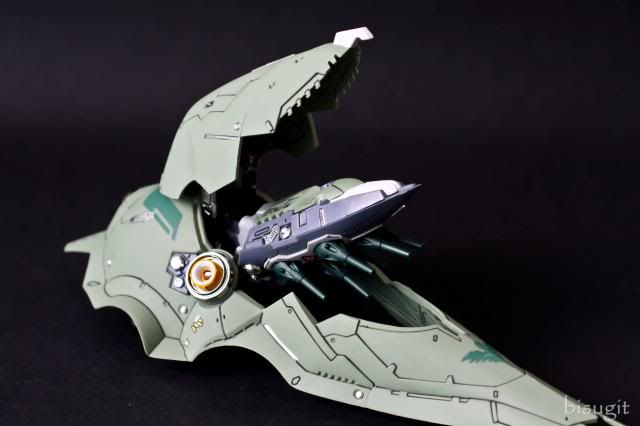
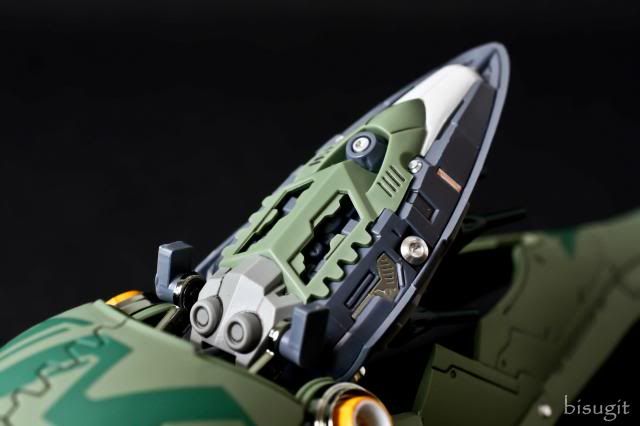
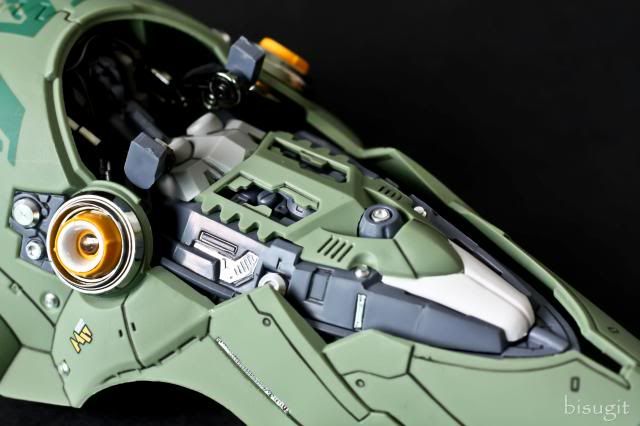
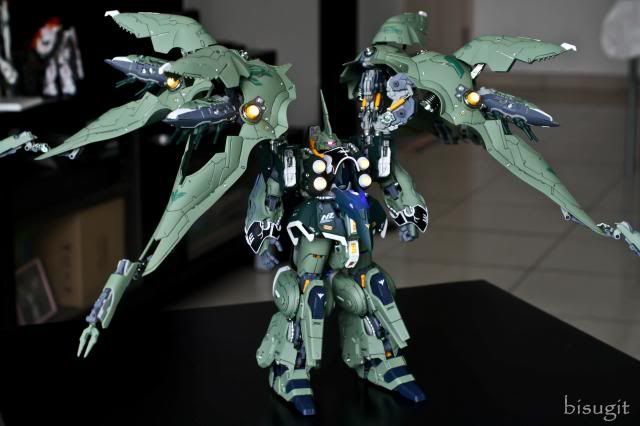
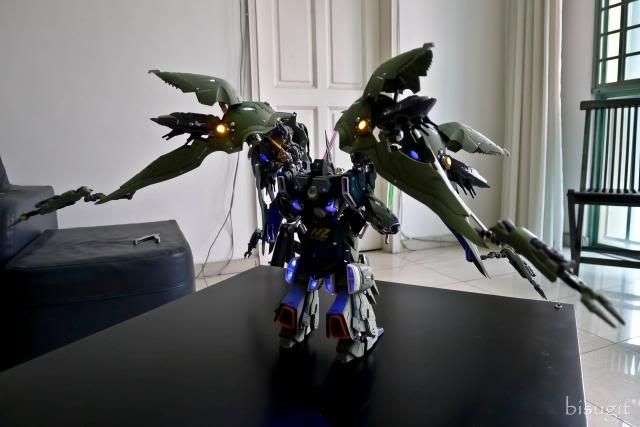
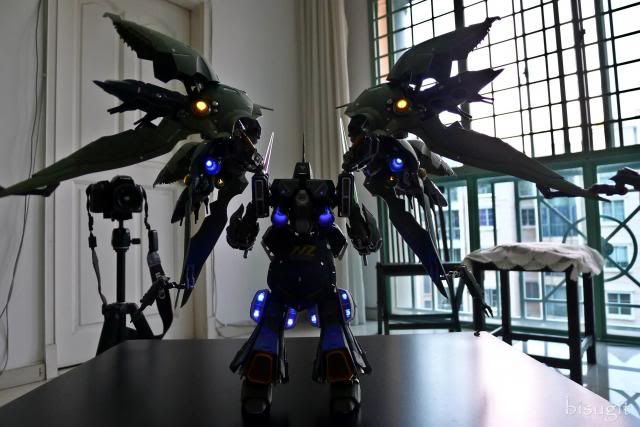
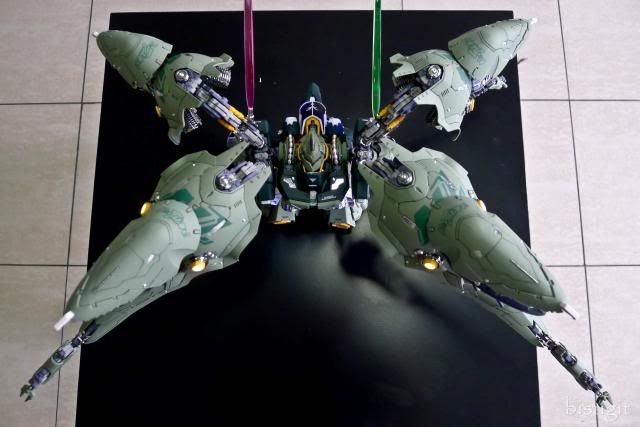
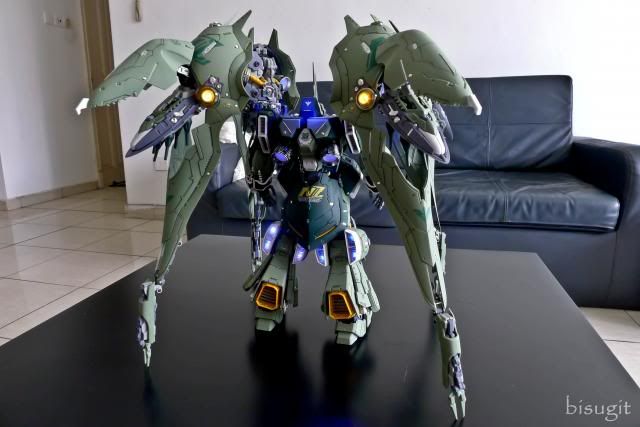
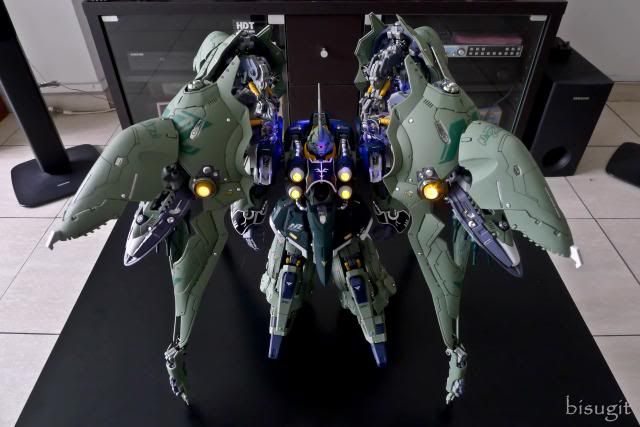
I'd have to say that the binders are my favorite part of this kit. They are highly detailed and articulated and I had so much fun posing them in different configurations. The only problem is that they are very heavy in relation to the main body's weight. That is too say, they are too much for the shoulders to support. The only way you can attach them without the shoulders swinging backward or forward is that they must be balanced. You must hold both shoulders and attach the binders one by one with your other hand and when you think that they are already balanced then you can let go of the shoulders, at least this is the way I do it. Without a stand, you must tighten the screws on the thigh and hip connection otherwise your Kshatriya will do a 160° split. Put a blu tack under those feet as well just to be sure. I wouldn't recommend attaching the binders for a long time without any other kind of support either for the binders or the shoulders.
Ice Breaker!
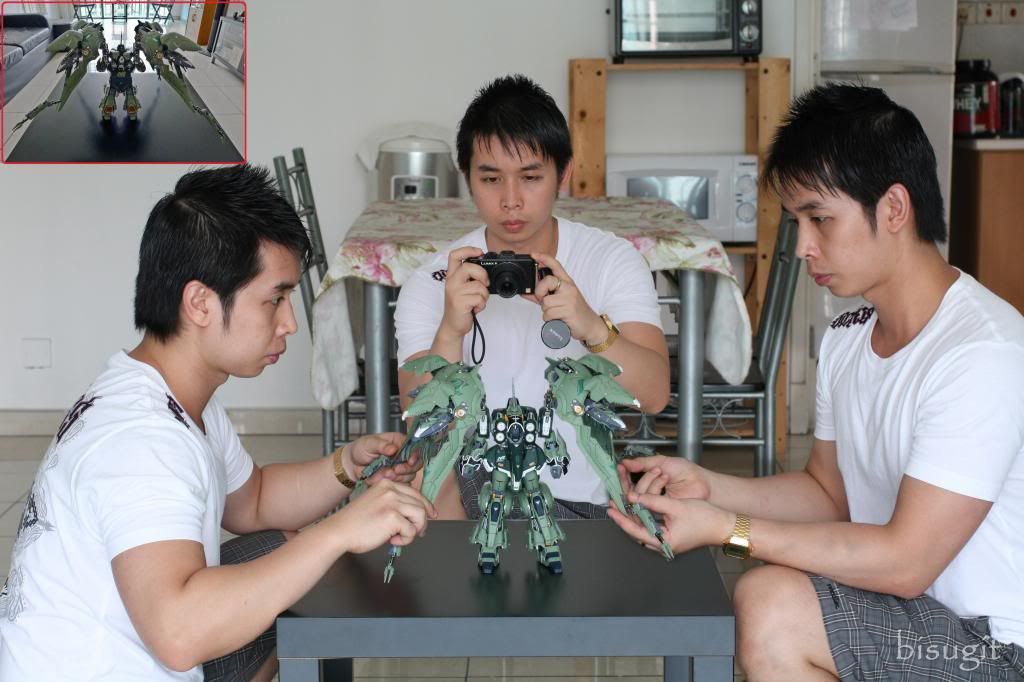
Behind the scenes of Elyn Kastrysha photo review:
Kage Bunshin no Jutsu!
It's almost impossible for the main unit to support the binders so I held the binders while the photos are being taken and since there's no one else around, I had to take the photos myself. Luckily, I learned how to do the Shadow clone technique from Naruto!
(edited photo on the top left, after I have removed myself and my clones from the picture :-D)
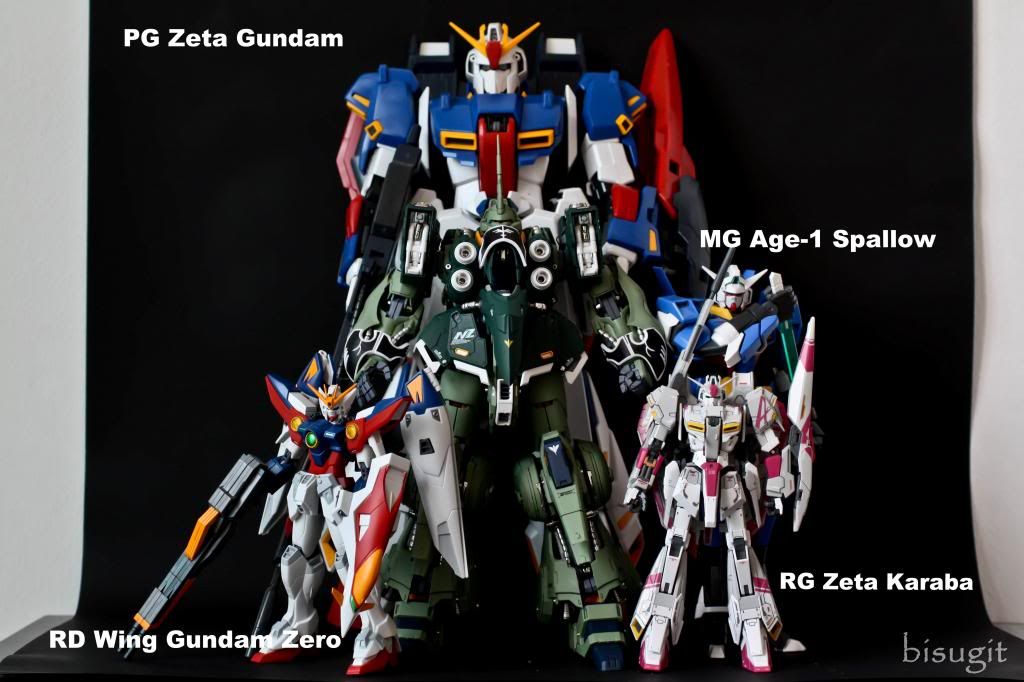
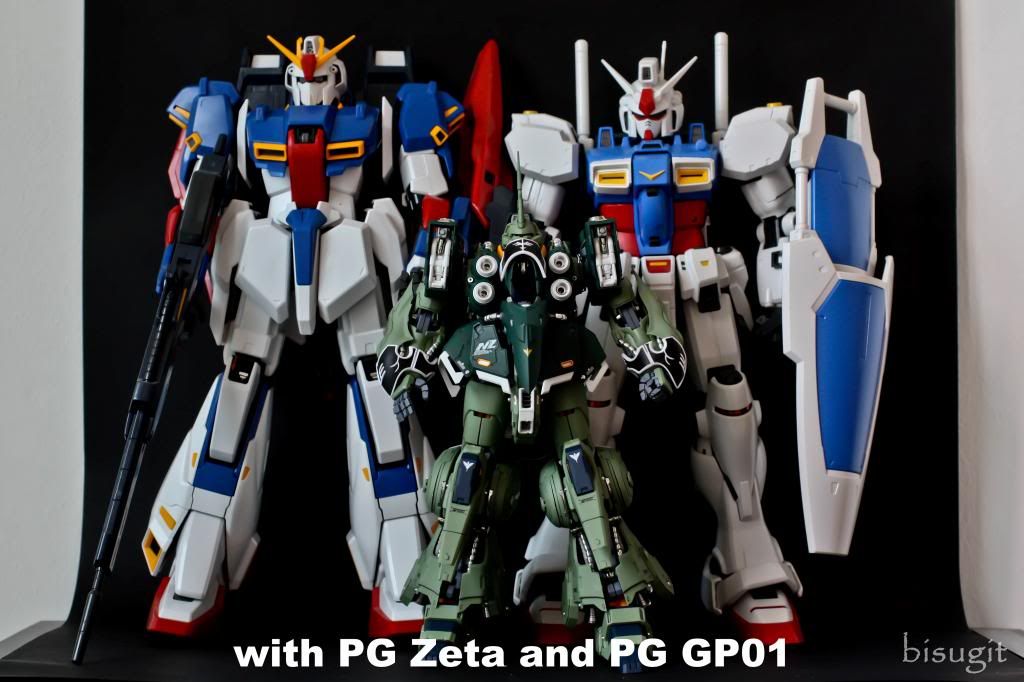
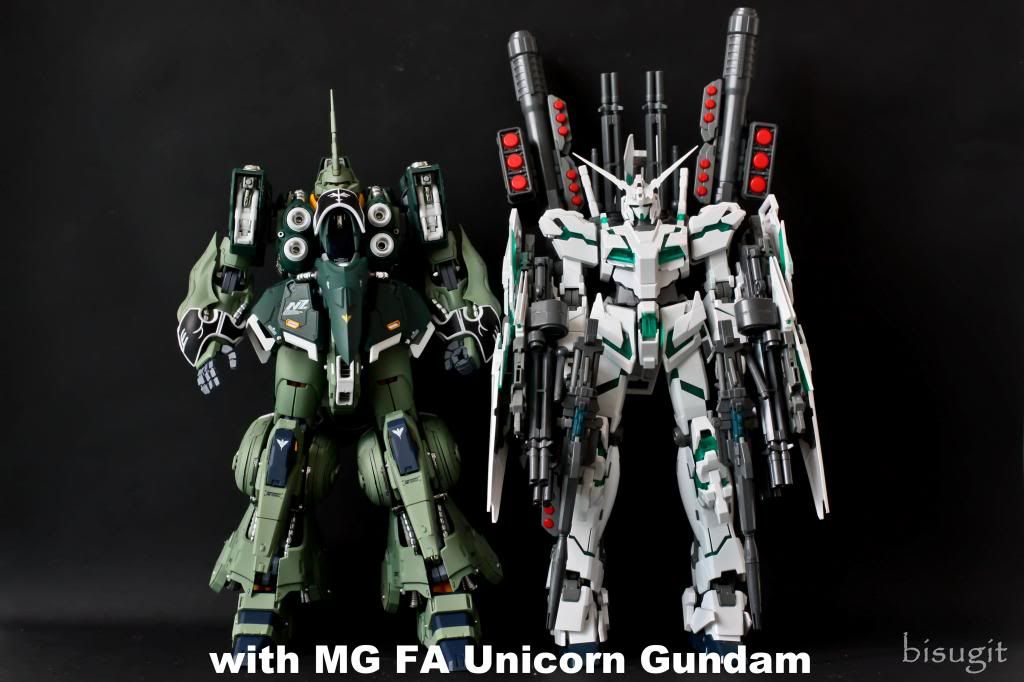
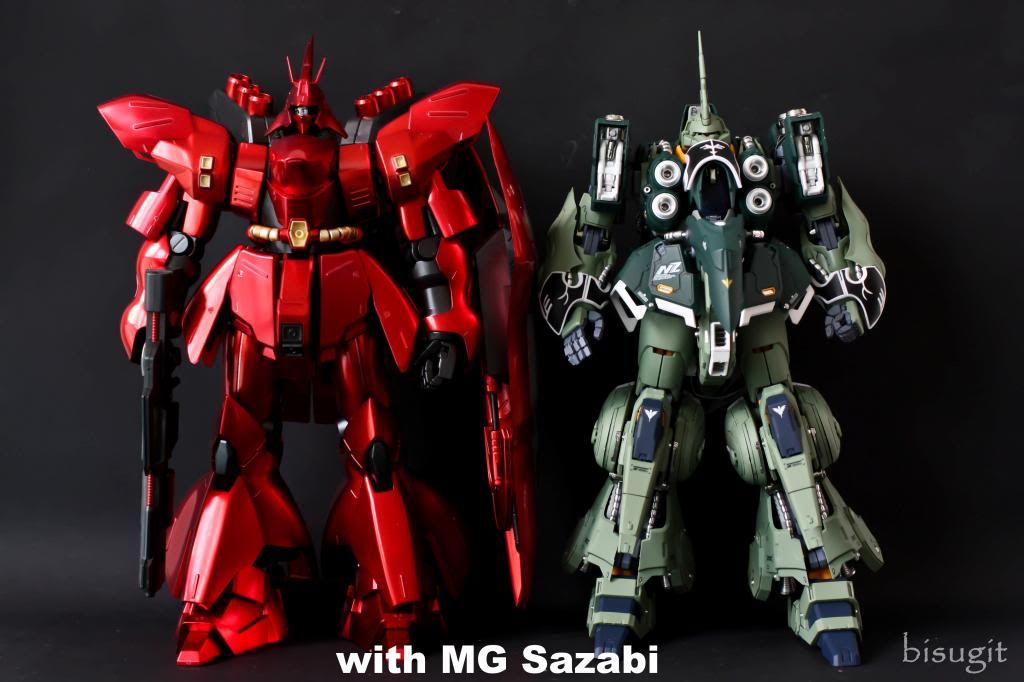
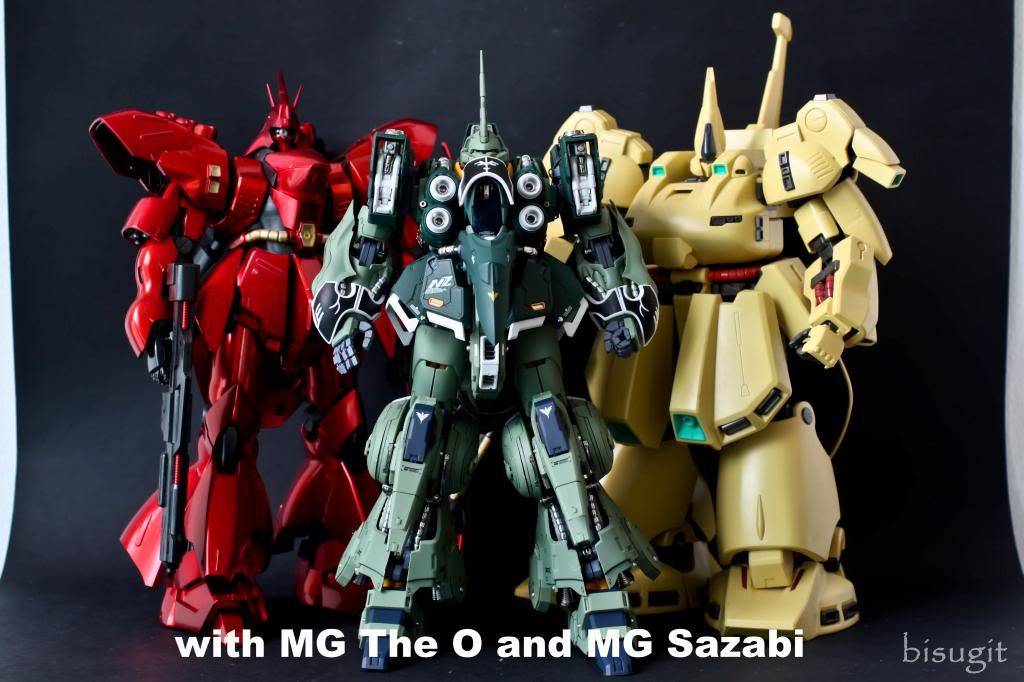
Size Comparison
 |
 |
 |
 |
 |
 |
This kit is tagged as a 1/100 scale kit but it is a little bit off scale compared to Master Grades which is also 1/100 scale. The height of the Kshatriya according to specifications is 22.3m (head height). This model is around 23cm from foot to tip of the head and 26cm from foot to tip of the antenna. That means this model kit's actual scale is approximately 1/97 (from foot to tip of the head). This is a little bit bigger compared to other mobile suit of the same actual height that is released in MG series.
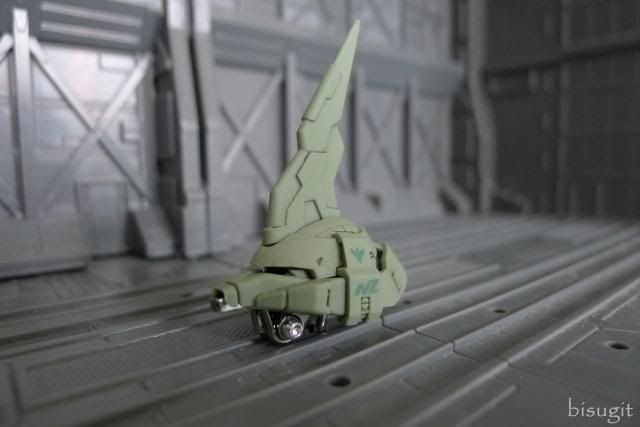
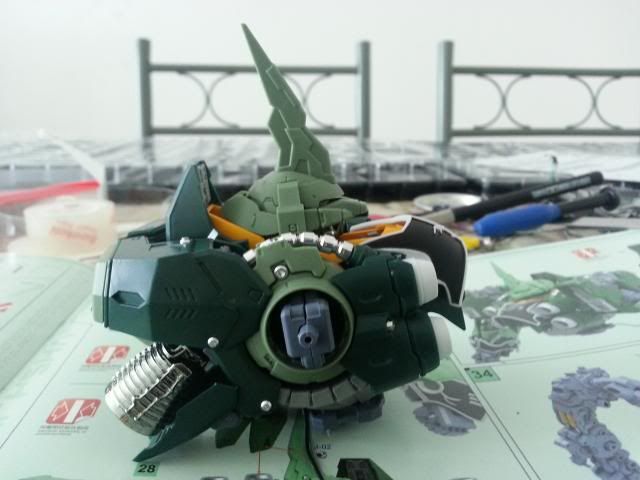
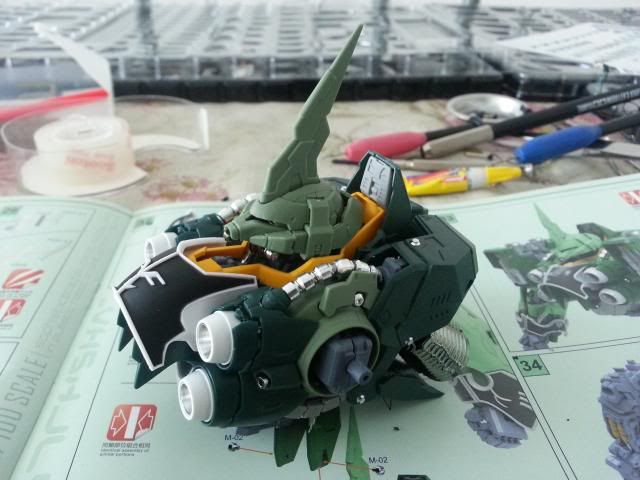
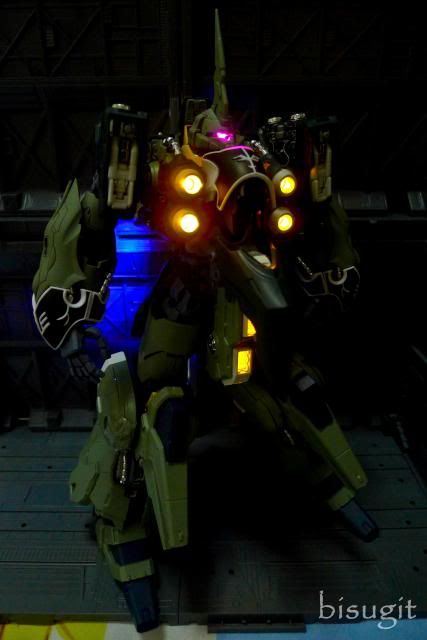
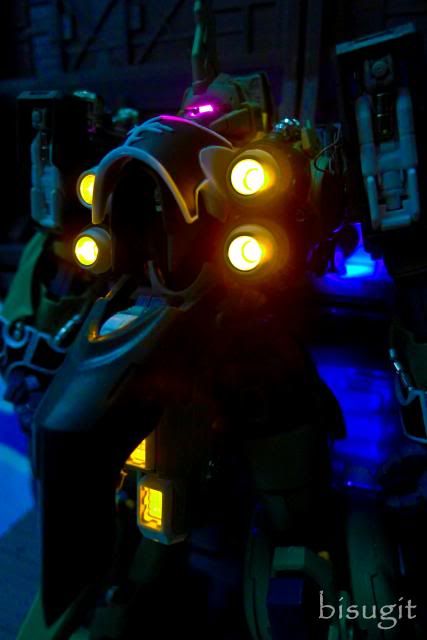
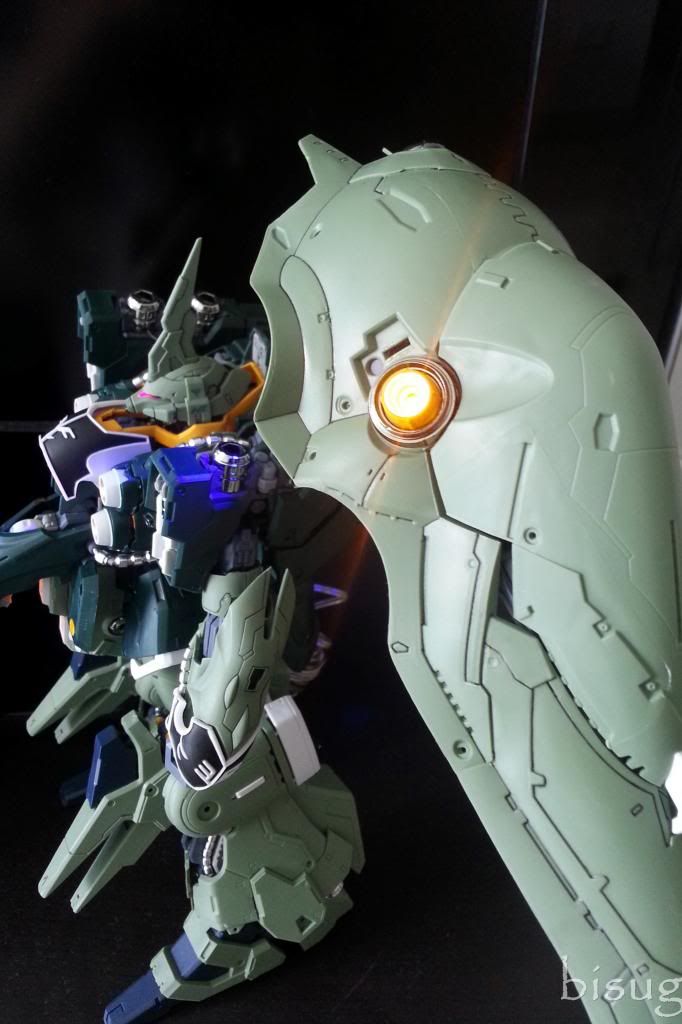
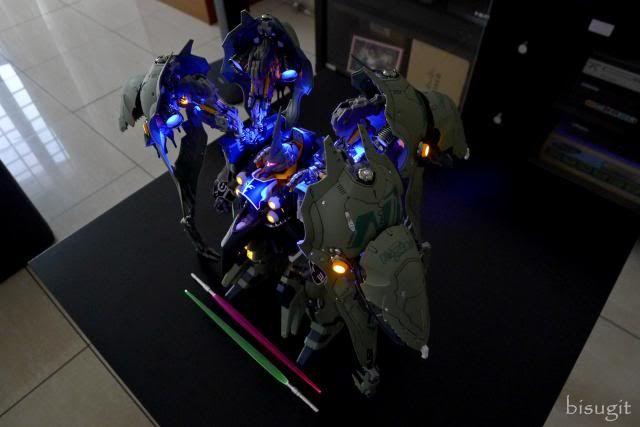
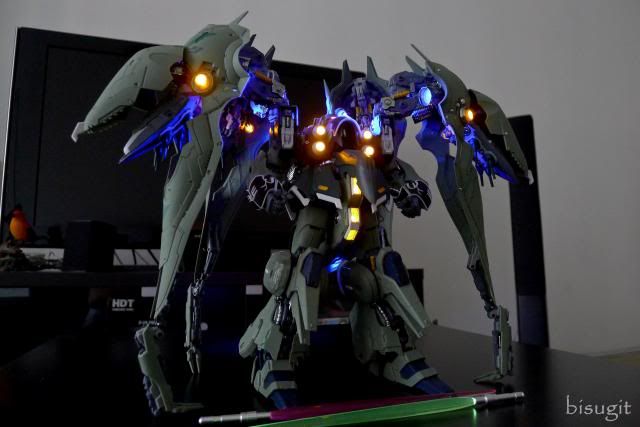
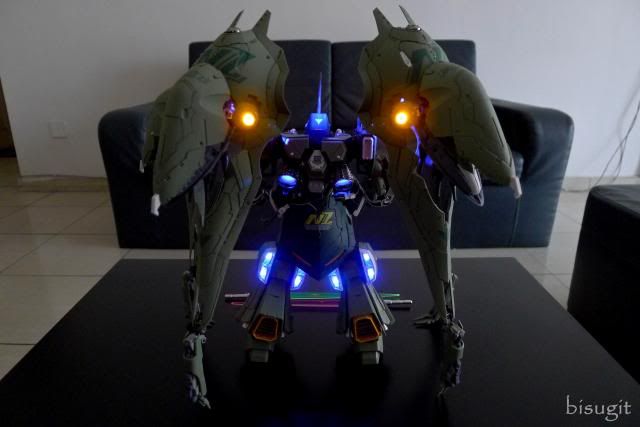
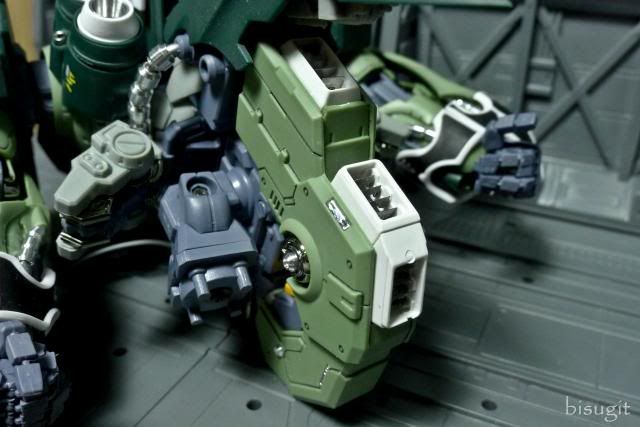
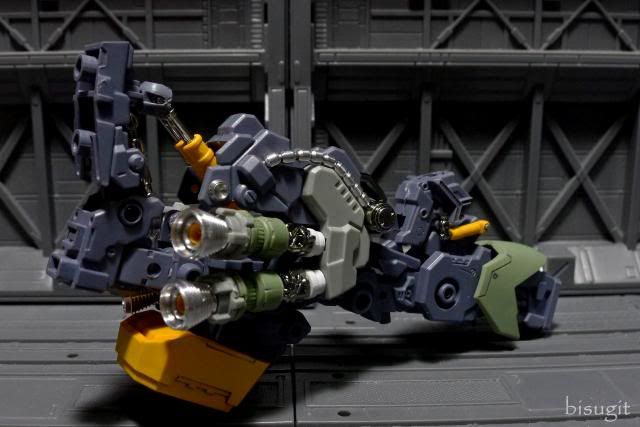
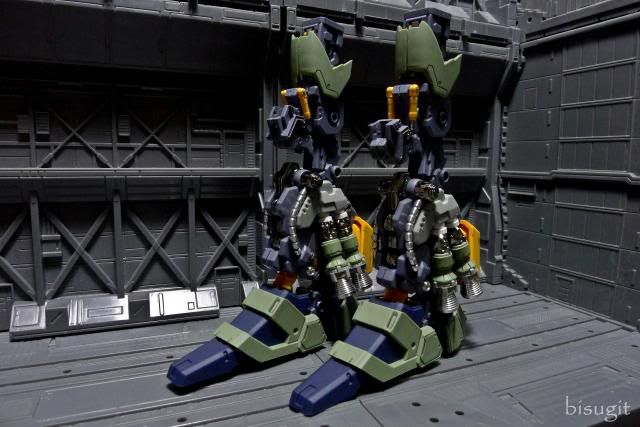
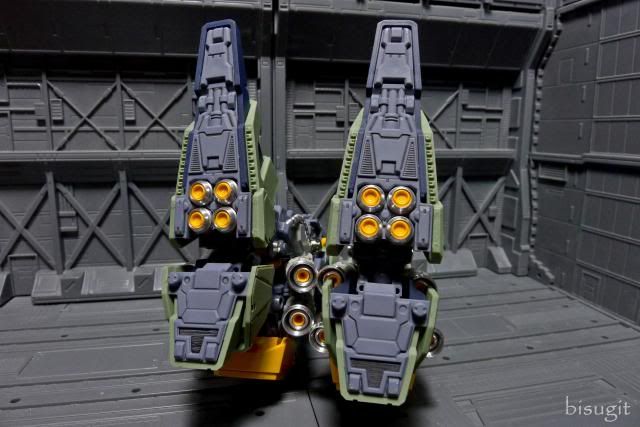
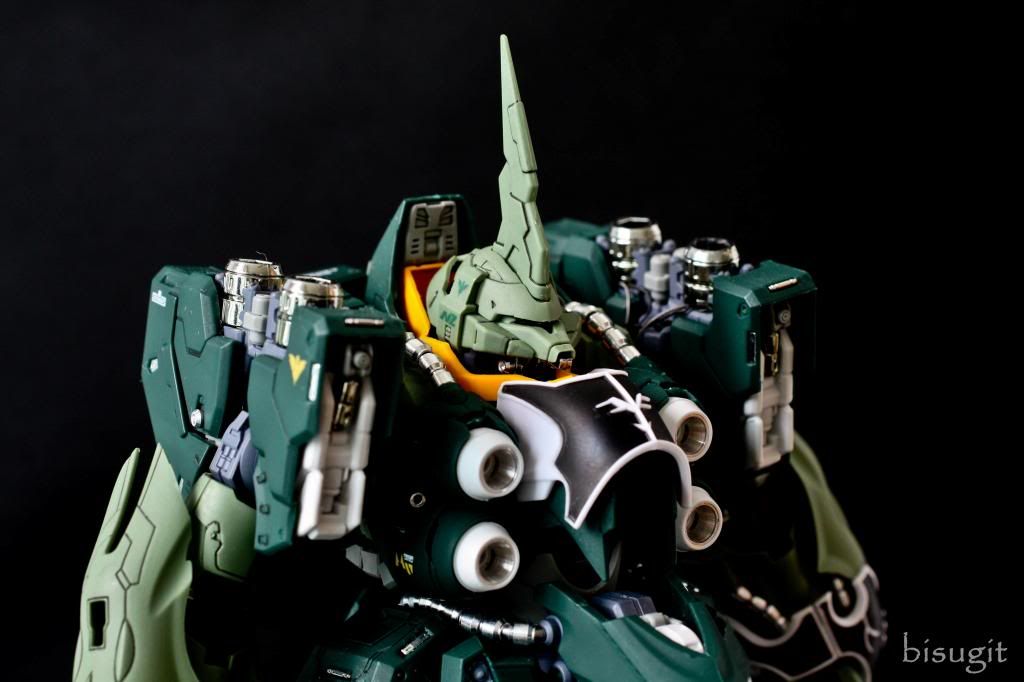
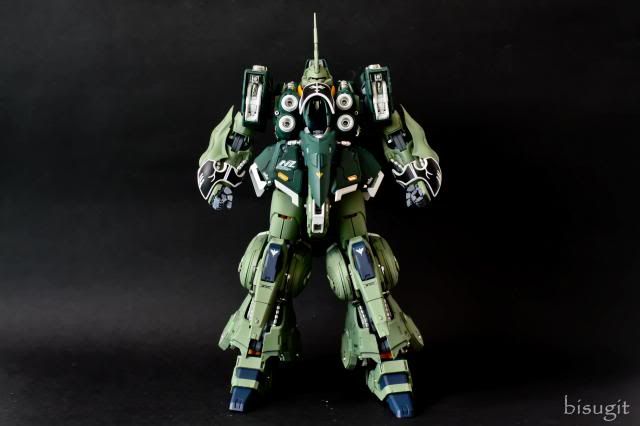
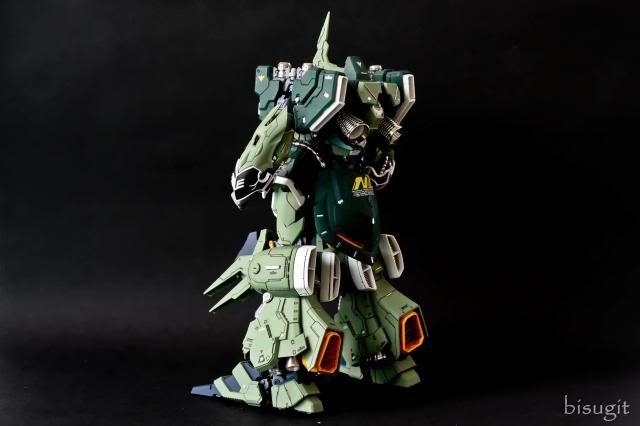
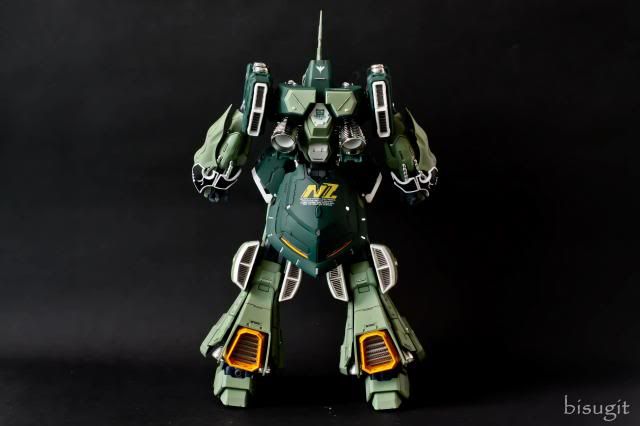
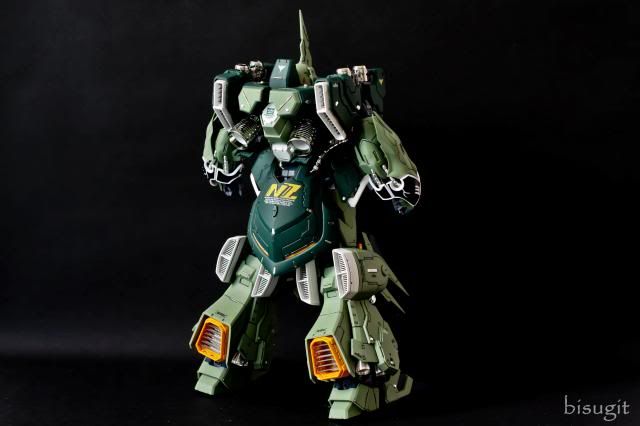
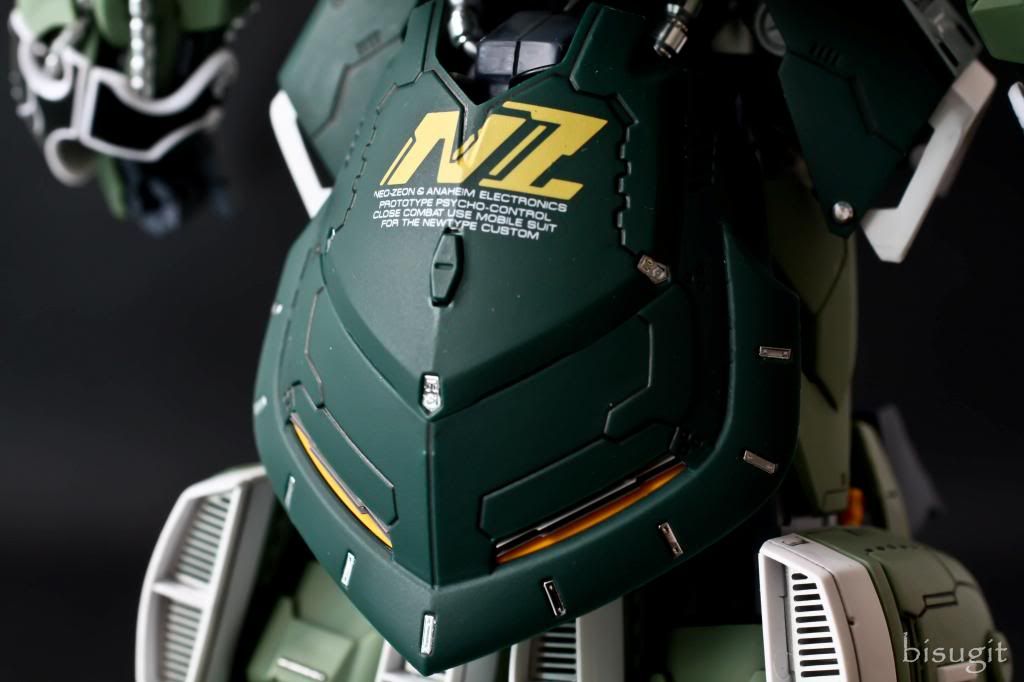
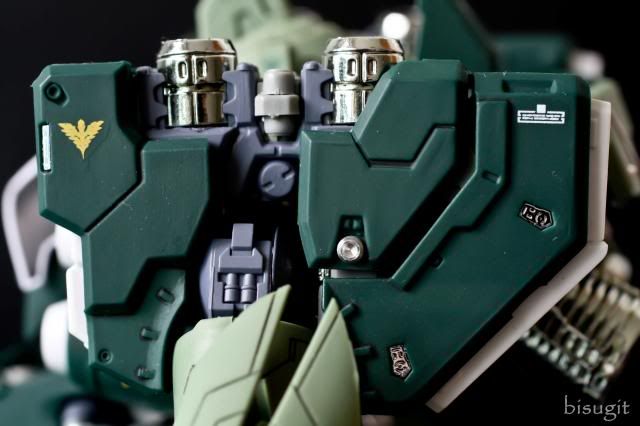
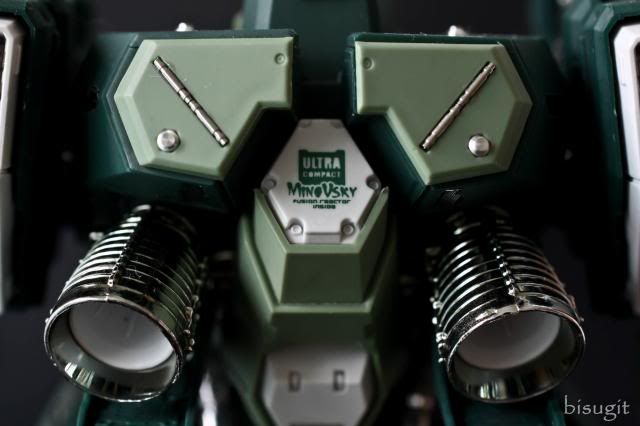
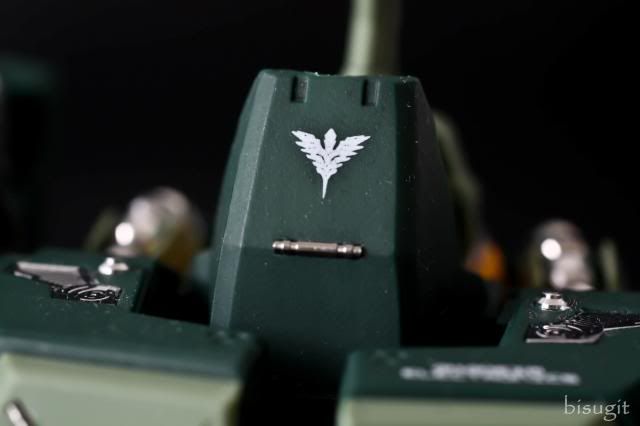
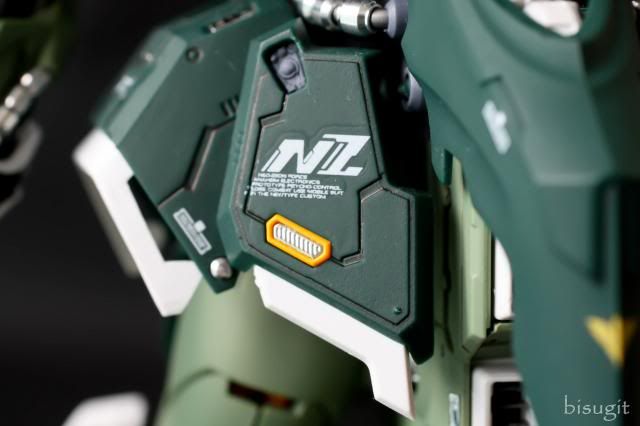
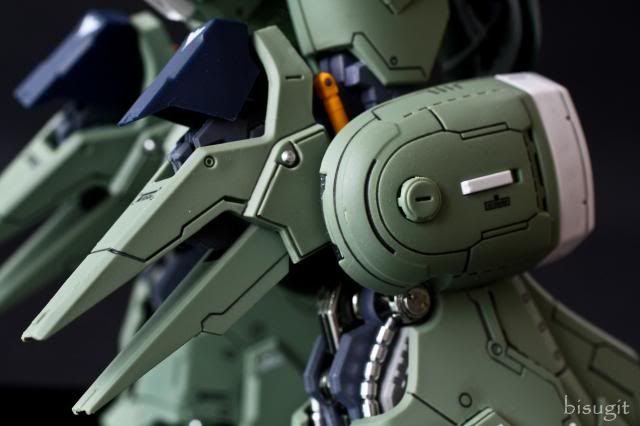
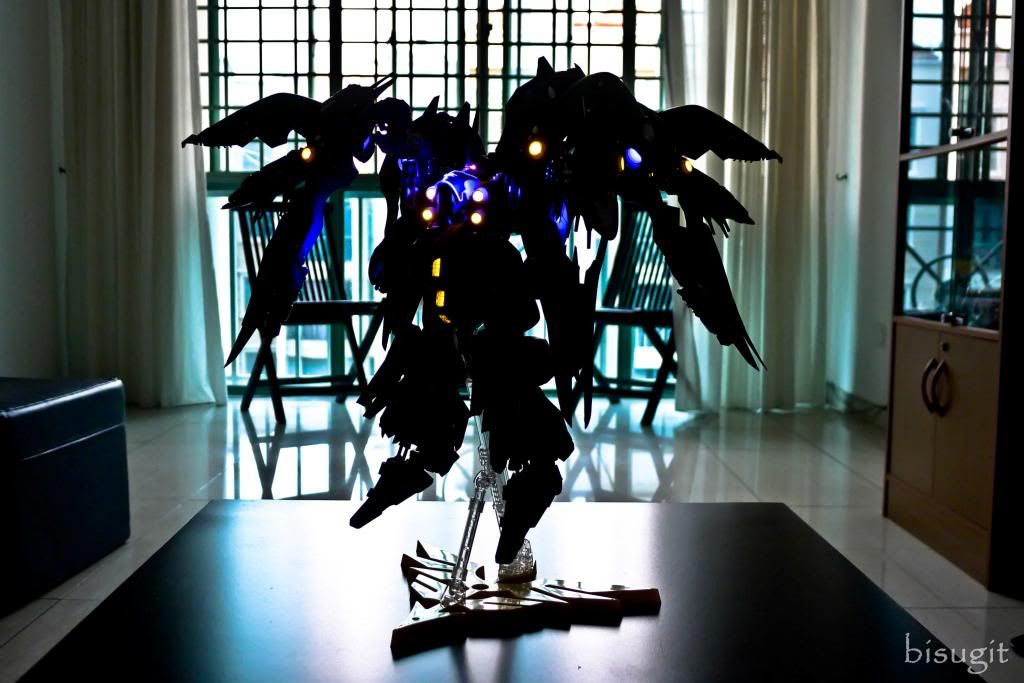
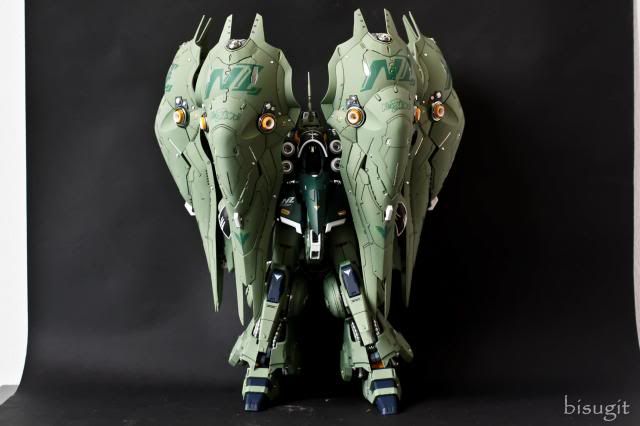
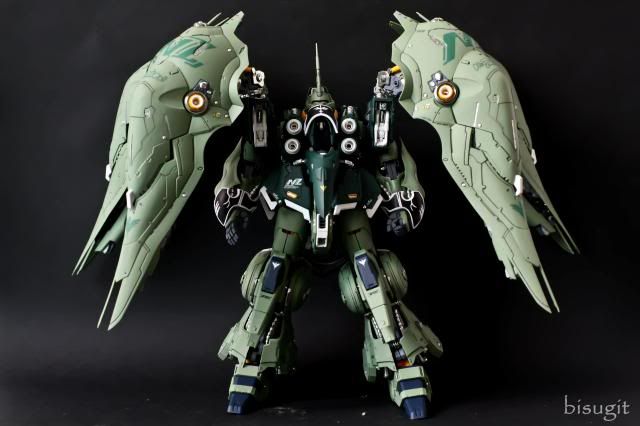
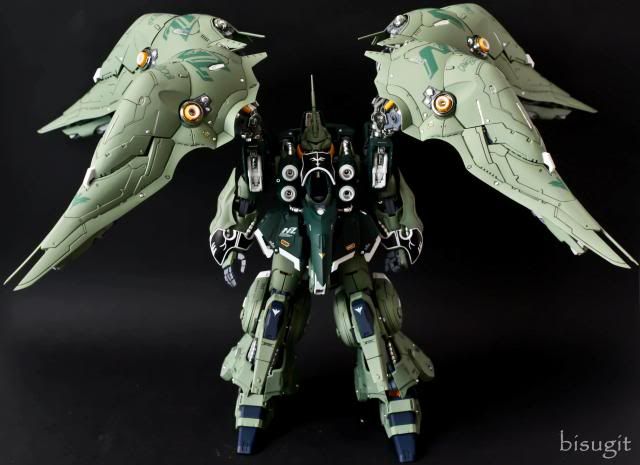
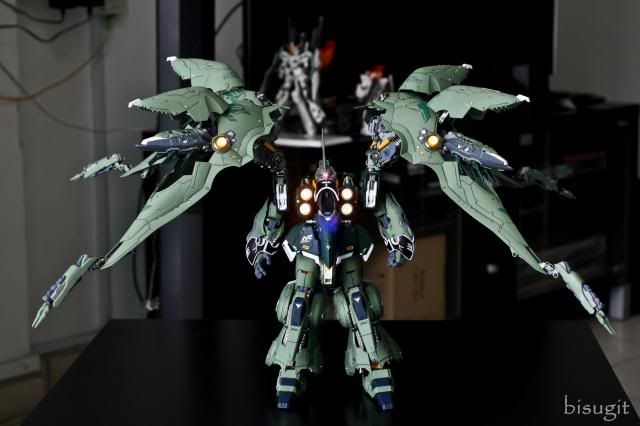
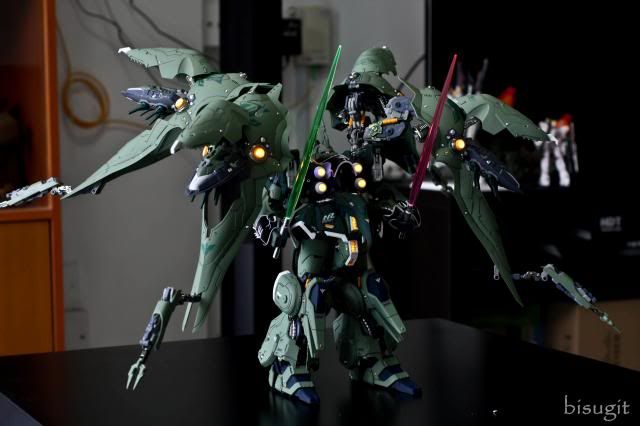
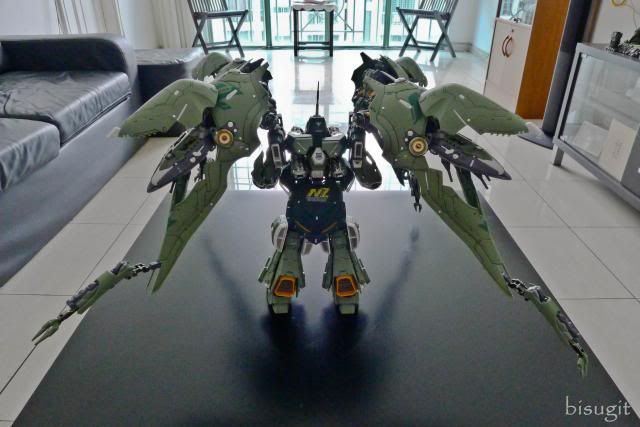
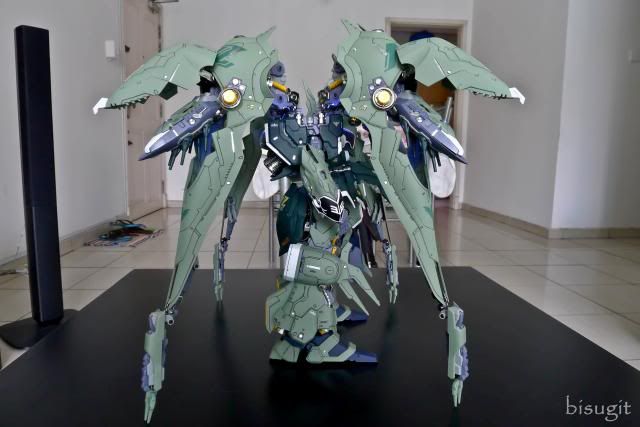
The Green Devil: NZ-666
 |
 |
 |
 |
 |
 |
 |
 |
 |
 |
 |
 |
 |
 |
 |
 |
 |
 |
 |
 |
 |
 |
 |
 |
 |
 |
 |
Final Thoughts
Articulation: 6/10
If I would rate the main body and binders separately then they would get a higher score. They are well articulated on their own. The legs can kneel and do a full split. shoulders rotate and the arms can be raised on the sides and fold well on the elbow. The head can rotate left and right but there's no hip articulation. The binders have a wide range of motion as well. Combining them makes this kit to become more of just a display piece with very limited poses. Why? because you need to maintain the balance between the 4 binders. Now the shoulder articulation is gone, The legs are pretty much in a standing position only, unless you use a stand, but then again the binders must still be balanced.
Plastic Quality 7/10
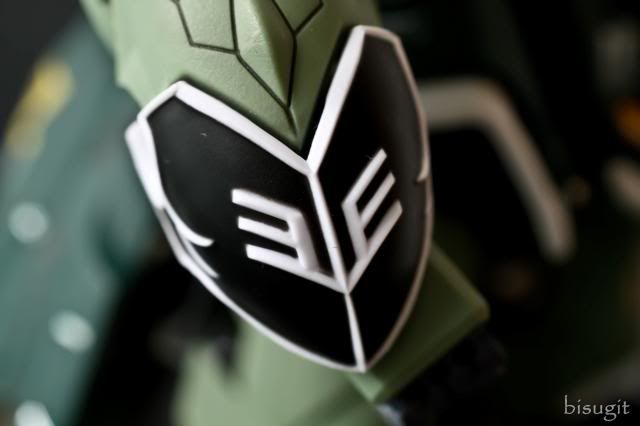
It's not bad considering this is a third party product. They are not too thin or too thick and feels durable. Honestly, I never broke any plastic parts while building this kit. I'm not sure what kind of plastic they used but I like that it sticks better with super glue compared those used by Bandai. The color separation are above average and the crest in the chest and arms are top notch.
Quality Control: 5/10
I dig the runner-less approach they made because it reduced my time building the kit but the big problem is that it's easy to misplace the parts. You can easily end up with a duplicate part that is supposed to be of opposite configurations with each other (e.g. for left and right side). It's also easy to loose those small parts if you are not careful every time you remove the trays from the box. Some of the molds are not smooth as well and you end up with plastic parts that needs to be sanded down.
Value For Money: 9/10
I pre-ordered mine for 225 Singapore Dollars. I have to say that I got my money's worth because this is really an awesome kit and because of the other add-ons like LiPo rechargeable battery, usb cable charger, metal decals, photo etched parts, metal bits for details, light up sabers, waterslide decals and a whole lot of LEDs. I also appreciate how well engineered this kit is. If you will be getting it for more than what I have paid for then you might have a different opinion. But here, it's just like buying an MG Nu Ver Ka and MG Sinanju OVA. Even MG The O is around this price range. But none of those kits is as awesome as this one. It is even better in other PGs in terms of display factor and armor details--yes the details for this kit is top notch and well thought off. It's like someone did a heavy modification of Kshatriya, recasted it, turned it into a plastic kit and put it in front of you just to snap fit together. Honestly, this is the best looking out of the box kit I've built so far.
Display Factor: 11/10
Panel lines--check
Chrome parts--check
Color separation-- check
Metal detailings--check
LEDs--check
Waterslide decals--check
Metal decals--check
Photo etched parts--check
Light up sabers--check
Design--outstanding
All of these is what makes this kit a jaw-dropping centerpiece in your display cab. And yes I gave it an 11/10 score. I will never look at the normal Ksahtriya the same way ever again. I feel like there's a lot of things missing in the normal kit now that I have this version. Elyn made a monster out of a monster mobile suit. The design is just amazing and it's oozing with details that you wouldn't see in any other unmodified kit (out of the box build) out there. I don't have the right words to describe how awesome this kit is and I just hope the photos can justify what I would like to say.
Recommendation: Highly Recommended
Yes, one might argue that there are too many quality issues surrounding this kit but if you are able to find a good supplier then most of those problems will be resolved thru parts replacement. The plastic mold imperfections can be easily fixed and the loose parts can be easily secured. But despite all of these flaws, this is still one heck of a kit. It's not easy building this kit, it's more difficult than fixing a Perfect Grade kit. But once you built it and see all those LEDs working, you will feel proud of what you have accomplished. So if budget is not an issue and you are able to come across this kit then don't hesitate and buy it immediately (don't forget to check the parts) :-). It is a must for Gundam collectors and Gunpla modelers/enthusiasts. I can honestly say that you are missing a lot if you don't acquire this kit. Well, this is just me and a lot of us have different opinions or mixed feelings about this kit. I hope this helps those who are still contemplating on whether to get this kit or not.
That's all for now. Thank you for reading and continue enjoying the hobby!
Very nice review and you built yours beautifully! Looking forward to recieving mine but a bit worride about so many complaints on missing parts. Also good to know it works with a normal bandai stand, thanks for the awesome review of this awesome model :D
ReplyDeleteWell I recently got mine in the mail and like almost everyone that has bought this kit I have issues with missing parts. Since i live in canada it's a 45 day wait before I get replacement parts....
ReplyDeleteI wouldn't recommend buying this kit, if your dependent on your supplier willing to replace your missing parts so you can finish a kit that's not acceptable for the price ($200-$300US shipping included).
Winarendra - Thanks and good luck to you. Hopefully, you can get a good set :-)
ReplyDeleteJims - I'm sorry that you got a bad set. If I'm also in your location I wouldn't be buying this kit either. Aside from the steep price, you're not really sure about the quality. Luckily I only stay in Singapore and have a good supplier. and I only got it for like 177USD. All the best on your replacement parts :-)
Hiya, fellow Singaporean here!
ReplyDeleteDont mind me asking, but where exactly is this Hobbymate that you've mentioned? I'm just beginning to build gunpla so maybe I don't have the prerequisite skills to tackle a kit of this standard yet (the LEDs come to mind..) but I wouldn't mind going to their shop and taking a look.
Just to be sure, Hobbymate isn't the same as Hobby Art Gallery (Sunshine plaza) right..?
Nice one. Would love to see this next to a resin Kshat.
ReplyDelete@orangemoon - hi, you can visit www.myhmshop.com to know more about hobbymate. Their shop is located at northstar bldg. the complete address is in that site. You would normally see some of Hobbymate labelled products specially accessories at hobby art gallery (sunshine plaza), hobby art @ work (mcpherson mrt) or Hobby art @ station (jurong east mrt). By the way i'm only a PR here in Singapore :-)
ReplyDelete@Arashi - Yep, that would be nice. I think the resin version is bigger.
Did you paint it? if so can you share what you used to paint? I really enjoy the color scheme. Or did you just topcoat it?
ReplyDeleteHi Mate,
ReplyDeleteGlad I found your blog!
For starters: Your Kastrysha looks amazing, awesome job.
I own the kit myself and I have been (slowly) working on it for several weeks.
Personally I have a lot of troubles with the LEDS, but that may be because I never installed LEDs in a kit before.. but hopefully ill be able to get it to work with a steady hand and a lot of patience.
One question for you: The metal decals that come with the kit, I never came across those before. How do you apply them?
Remove the back sheet, apply them and remove the top film.. or is the film required to give the decal that metallic shine?
Hope you can help! :D
JJ
The Netherlands
@Zoidberg001 - i didn't paint the kit, just used Tamiya clear flat..
ReplyDelete@Uchianseron - Thanks!
ReplyDeleteThey are just like stickers. The film is just to assist you in applying the decals and to protect the decals itself during application as you might use tweezers to apply them and thus making it prone to scratches. after you applied them you can remove the film.
Your the first review I've read that hasn't bashed the kit with words like "crap, rubbish, never again" Given me some hope that when mine arrives i'll be ok. Although I am in the UK and not sure who to seek out for replacement parts :(
ReplyDeleteOne question did you apply the flat topcoat before or after putting on the metal decals?
ReplyDeleteHello, very nice review you got there! I would like to know where to order the kits? I think I'm getting one my self.
ReplyDeleteNice build. I was wondering though if you also top coated the inner frames?
ReplyDeleteNice review, i also have the same concern with armourworld once i got mine... the supplier i have does not have spareparts for the kit... i still dont have it but i love it...
ReplyDeletewhere i can buy this kit???
ReplyDeleteim in Indonesia....
hi bro, where can i still get this? what shop name u brought in singapore?
ReplyDeletewhere did you order this brother~ really wish to know~ Appreciated if you may email me at LQTMS87@yahoo.com no caps.
ReplyDeleteJohn
wow.. im searching for this.. where did you get it ?? please inform me at ferdinand.tjandra@gmail.com.. im from indonesia..
ReplyDeletethanks before
where i can buy this kit? im from indonesia
ReplyDeleteplease inform me at kamalfauzani16@gmail.com
anyone know where i can still get this kit? hit me up @ thriceless@gmail.com
ReplyDeletePor favor deseo comprarlo ayuden donde poder comprarlo. Gracias
ReplyDeleteHow exactly do the binders light up when you connect it to the shoulders? I dont see any connection points for it and it kinda confuses me.
ReplyDeleteSorry guys but I can't find anyone selling this as of this moment..
ReplyDelete